Wildcard Week
Table of content:
1 - Designing2 - Generating toolpath
3 - outcome
4 - Changes in the design
5 - Re-generating the toolpath
6 - Operating the machine
In this Wildcard week, we had to design and produce something with a digital fabrication process that we had not covered in the previous assignments.
Out of the few options i had, i decided to explore the CNC sewing machine(Usha MC-200E), which is in the fabricademy lab at Vigyan Ashram. Just
like operating any other machine, I had to go through three stages to complete the assignment: computer aided design, computer aided machining
and operating the acutal machine.
Designing
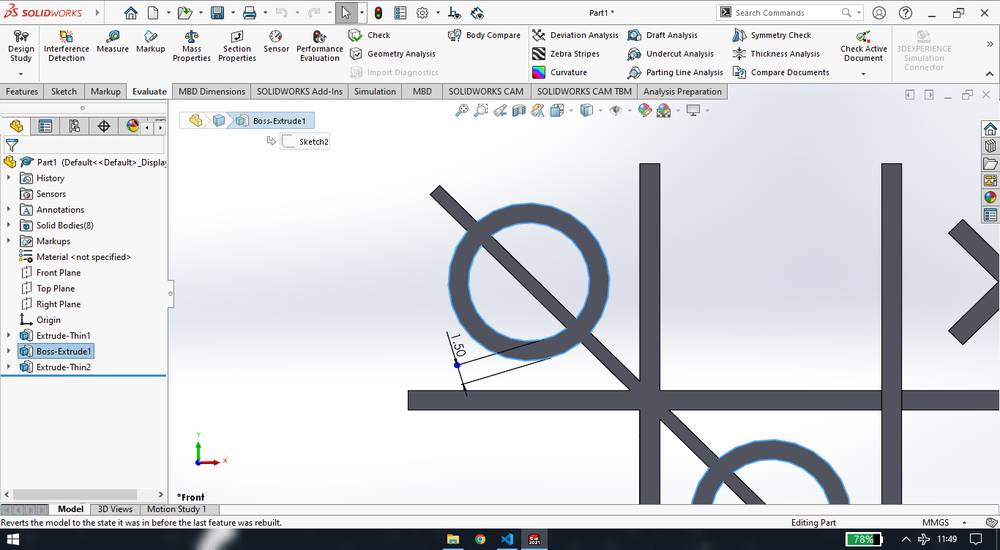
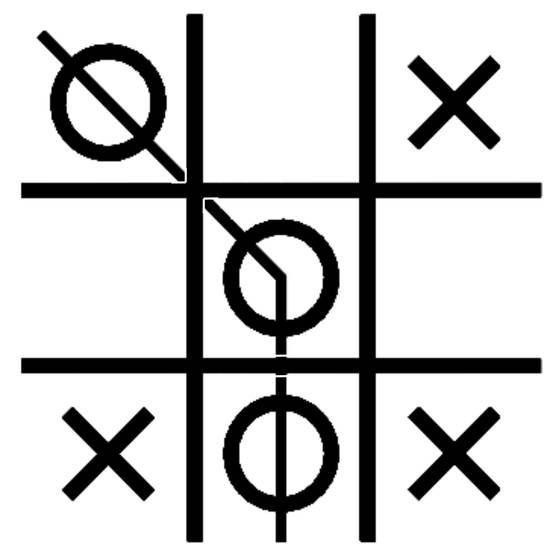
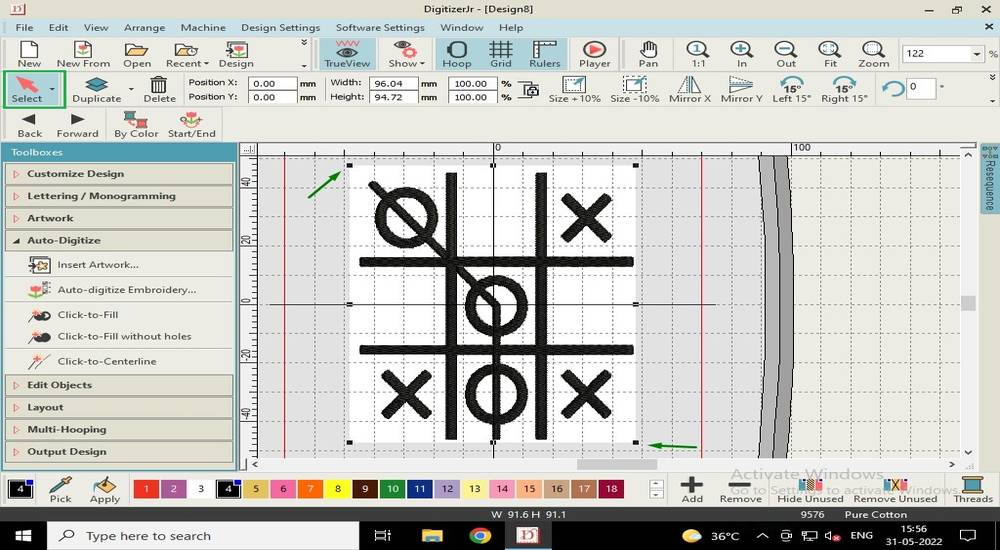
I made a tic-tac-toe design in the solidworks.
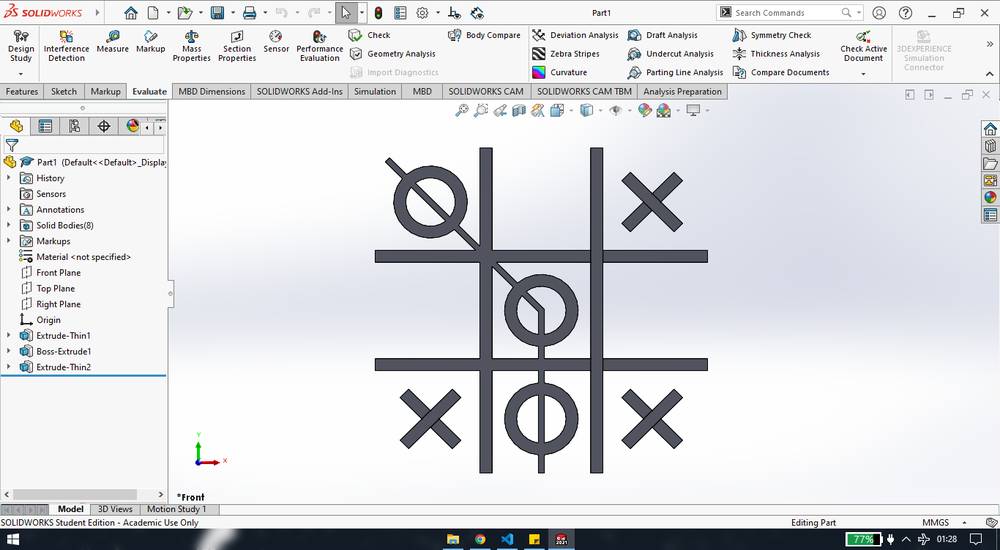
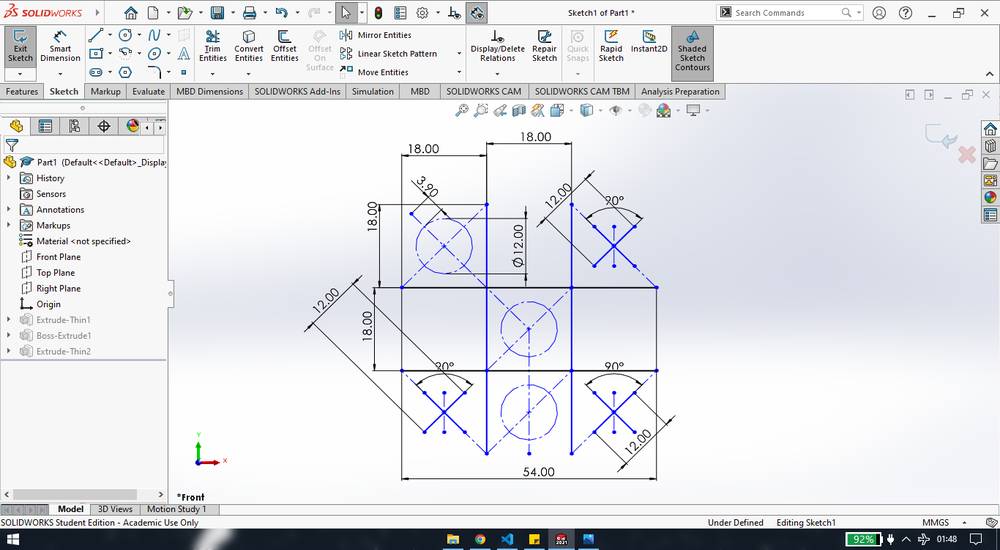
I kept the thickness of the "X", "O" and the "#" as 2mm,
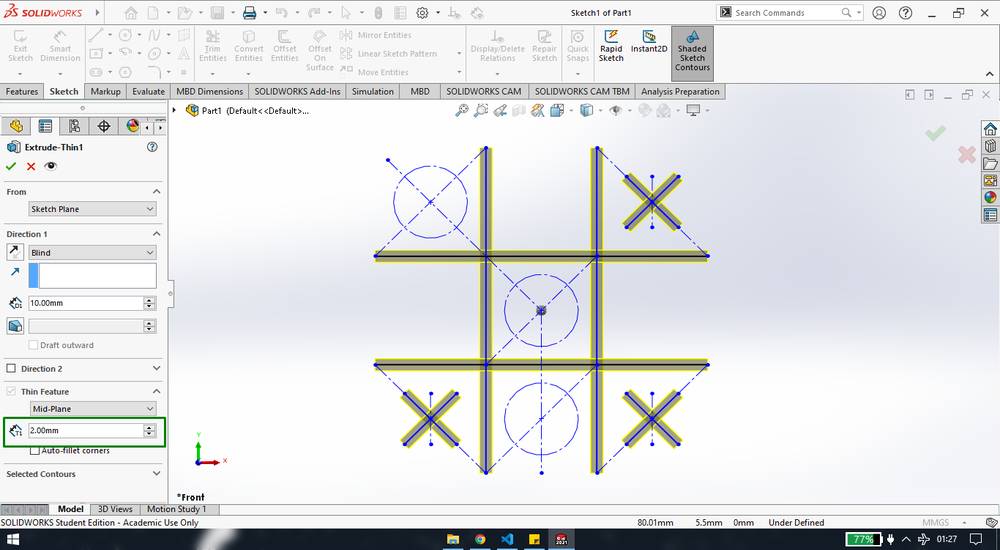
I kept the thickness of the line that connects the three circle as 1 mm,
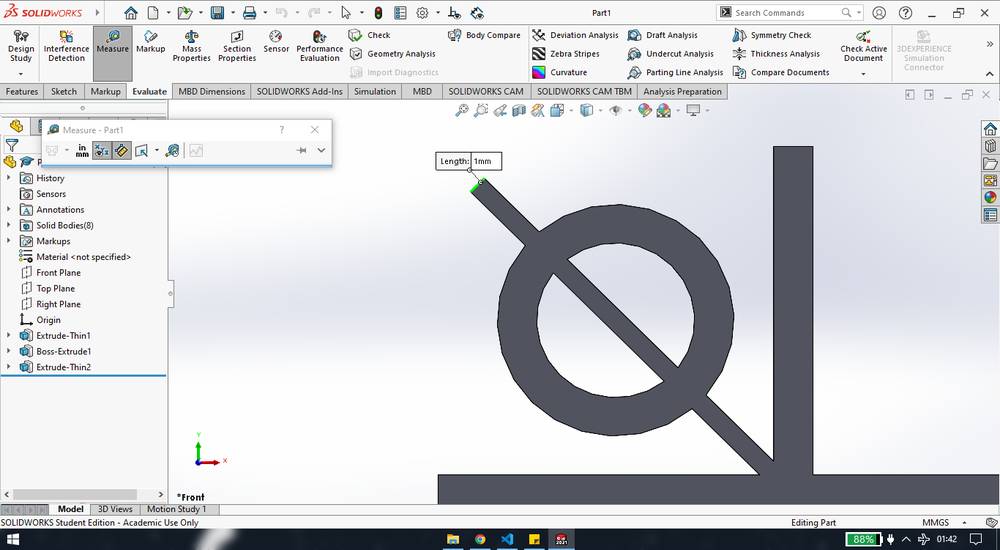
After the model was ready, i exported the file as .png format,

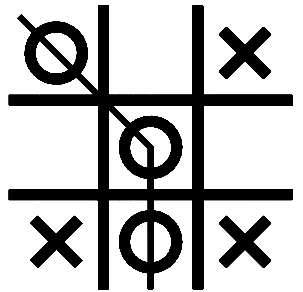
This is the .png file that got exported,

I then went to this website: https://manytools.org/image/colorize-filter/
and converted the image into monochrome. I set the color to black(0,0,0) and contrast to maximum level,
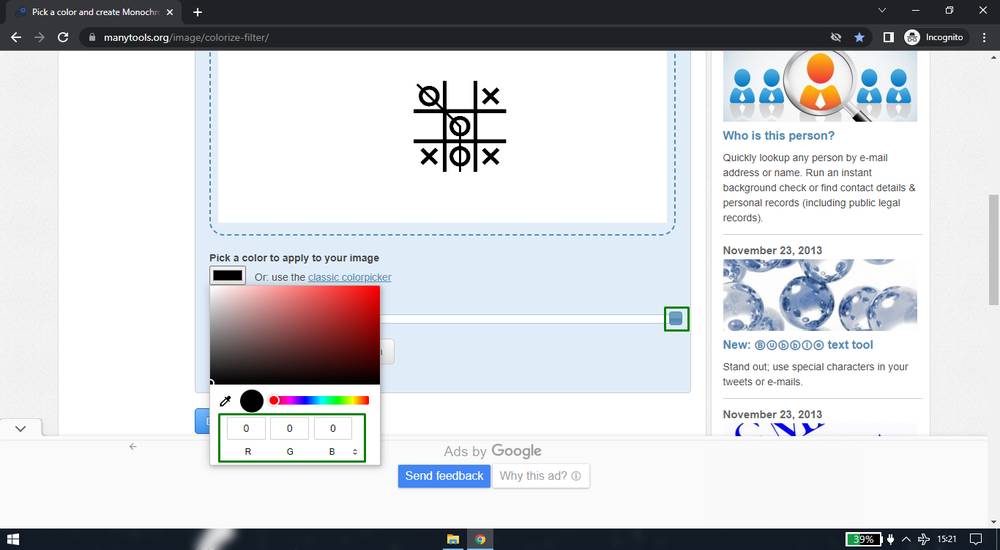
Here is the monochrome png of the deisgn,
You can download the solidworks design file from here:
xo cloth design
Generating toolpath
For generating the toolpath, i was using Digitizer Jr. software version 5 which was pre-installed in the
fabricademy lab's PC. Digitizer Jr. is a paid software and you'll need a licence key. Link for Digitizer Jr. v5: https://www.elna.com/en-gw/downloads.php?type=5&id=590
These are the steps i followed for generating the toolapth,
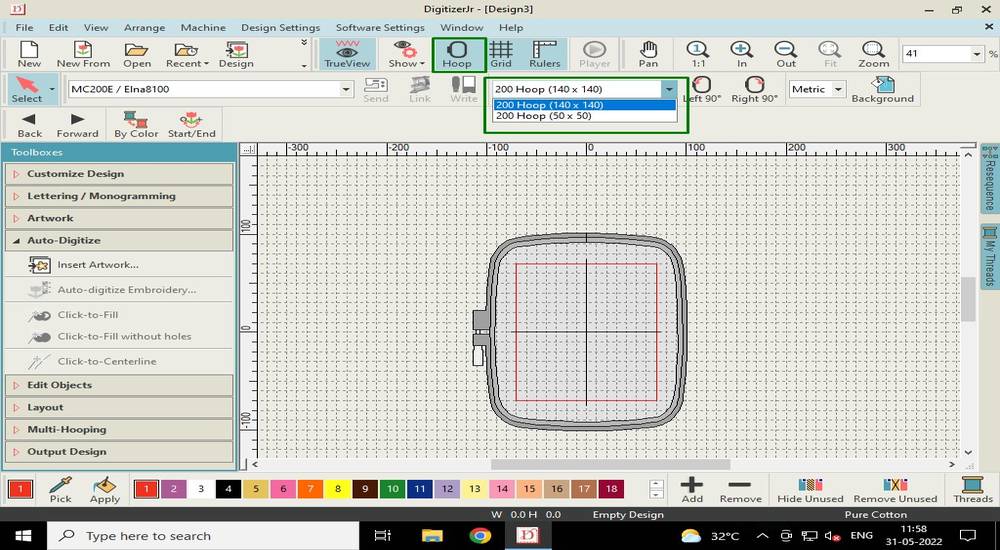
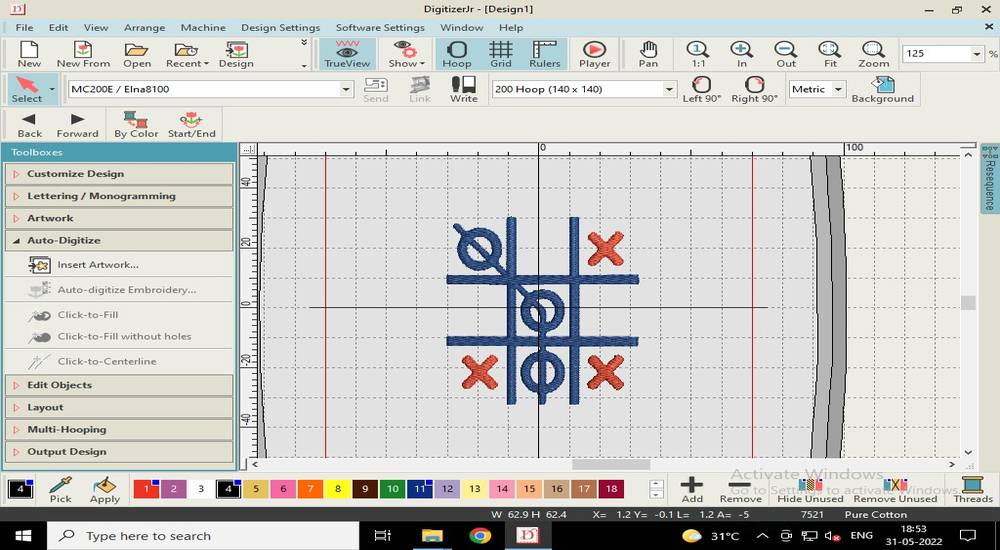
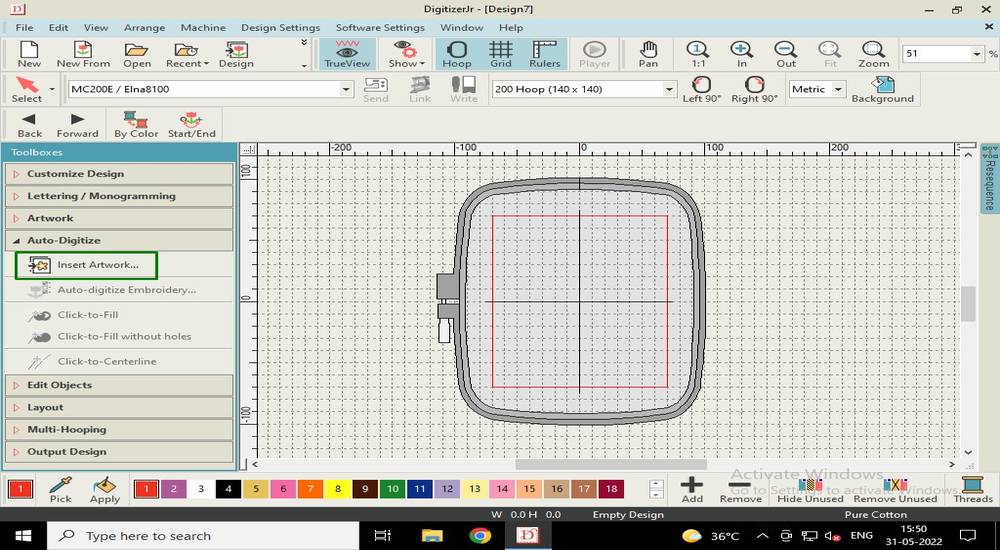
Since i wanted to generate the toolpath for the Usha MC-200E embroidery machine, i selected "MC200E/Elna8100" as the machine,
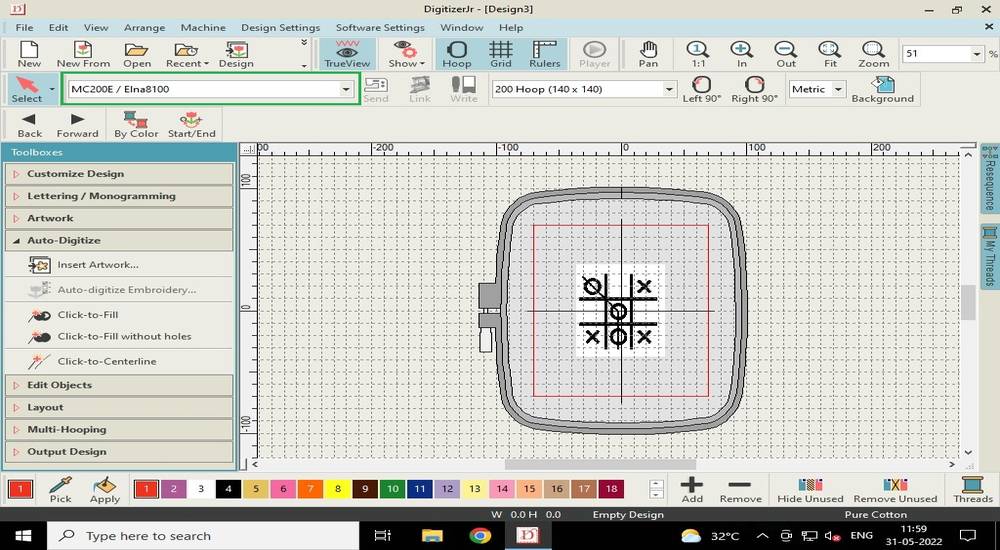
select the hoop size,
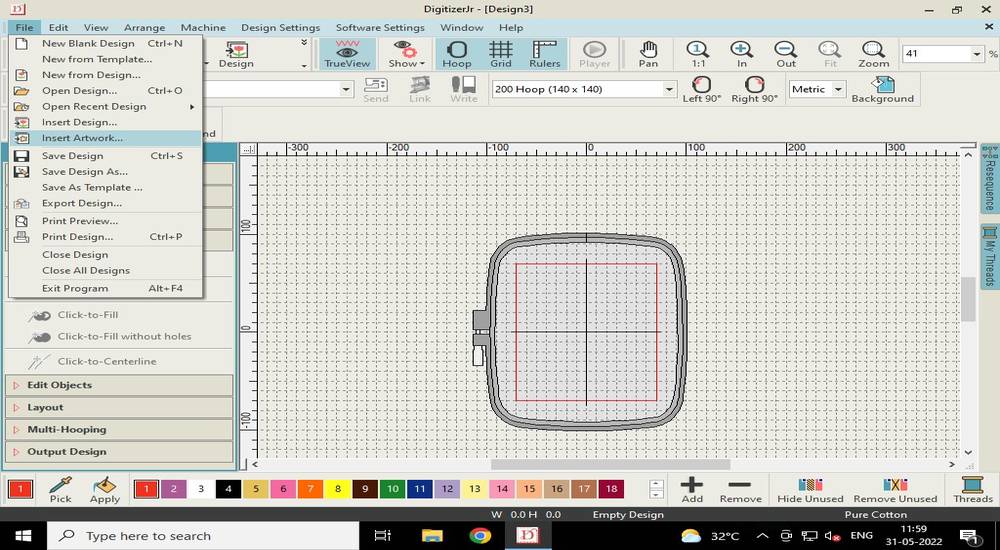
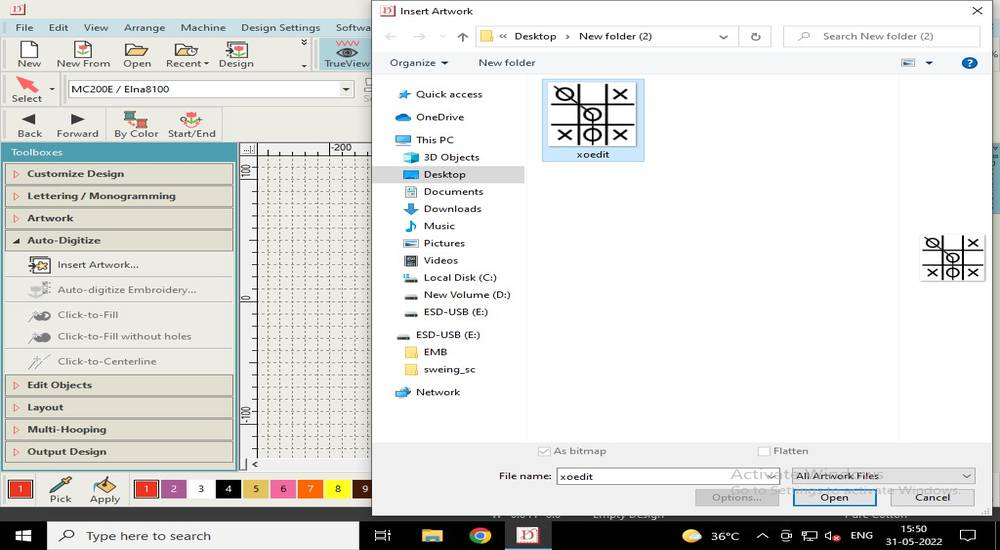
import the monochrome image by selecting "Insert artwork" from file,
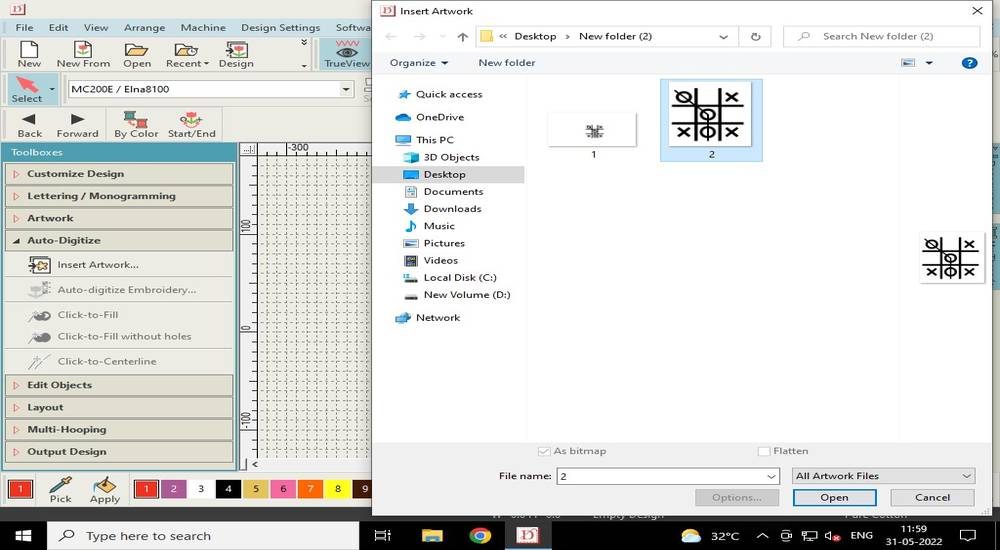
You can see the size of your design at the top. The software considers the background image too, when calculating the size of the design,
so your actual design might be small and can fit into 50x50 hoop but it is better to select a bigger hoop.

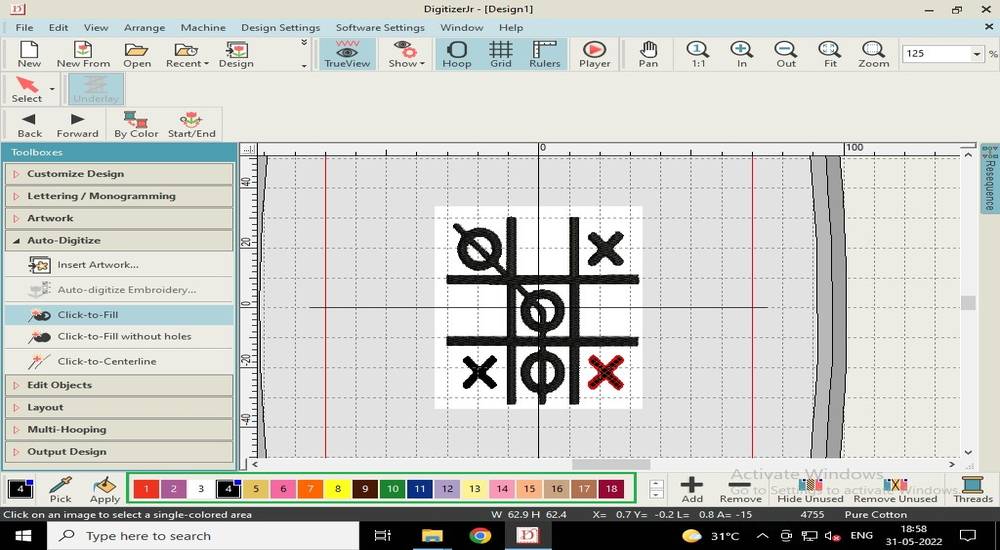
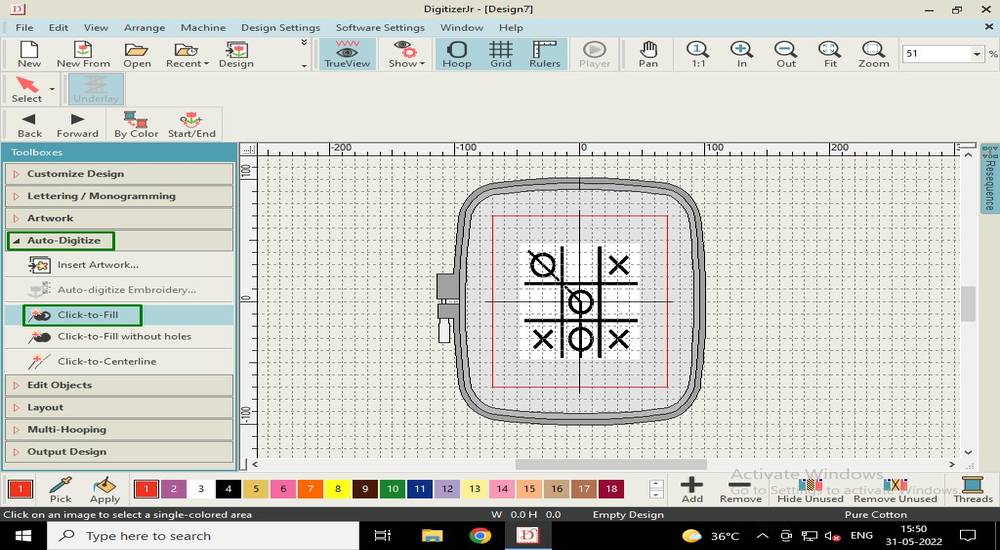
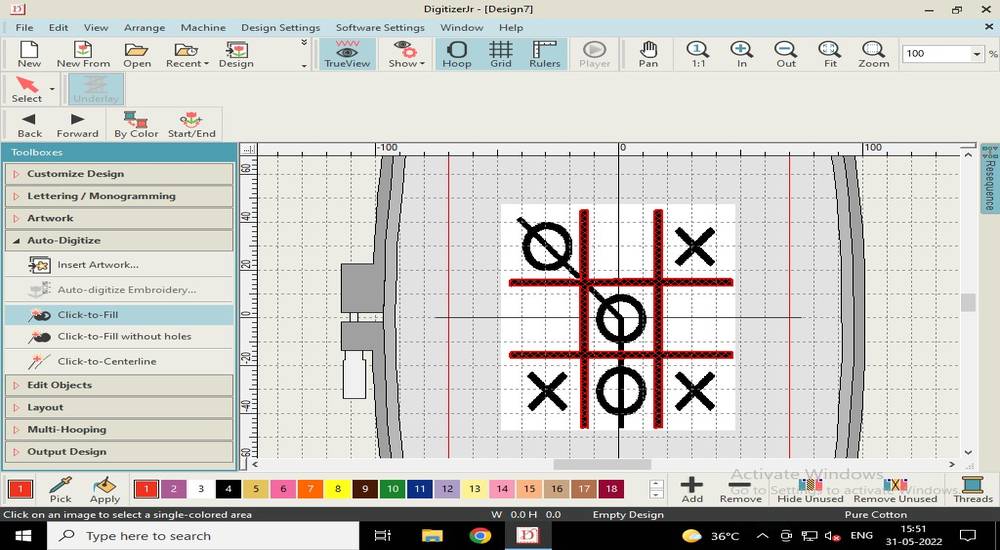
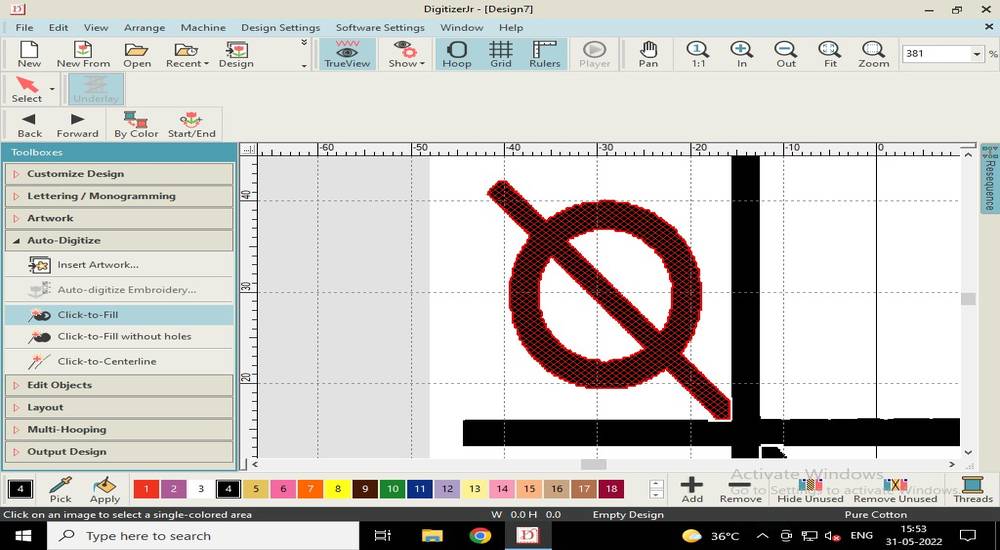
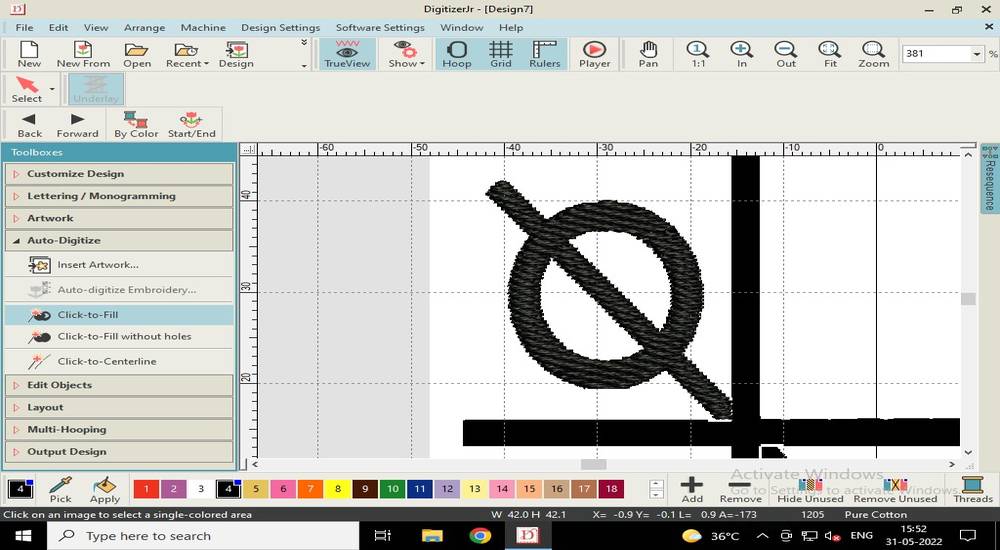
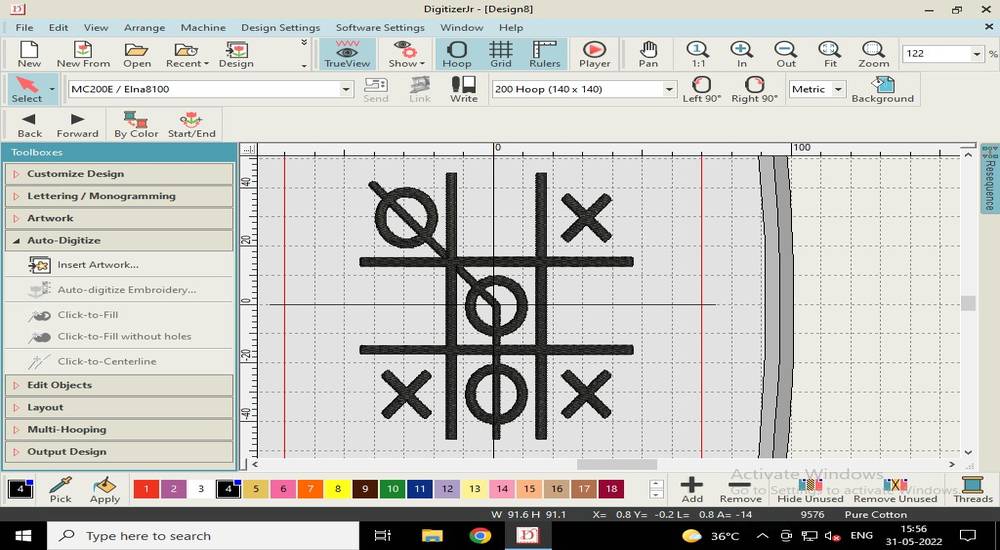
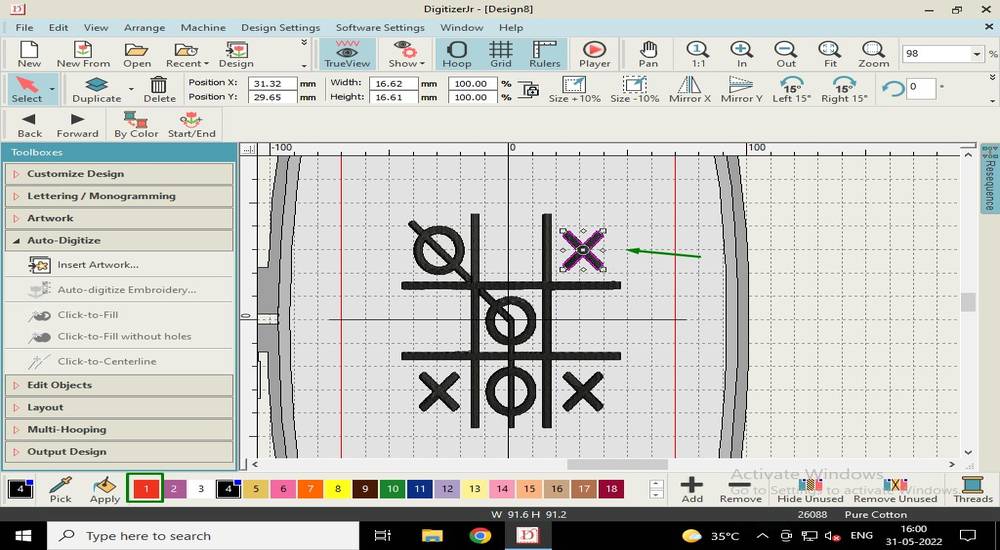
Select "Click-to-fill" under Auto-Digitize and then click on the image,
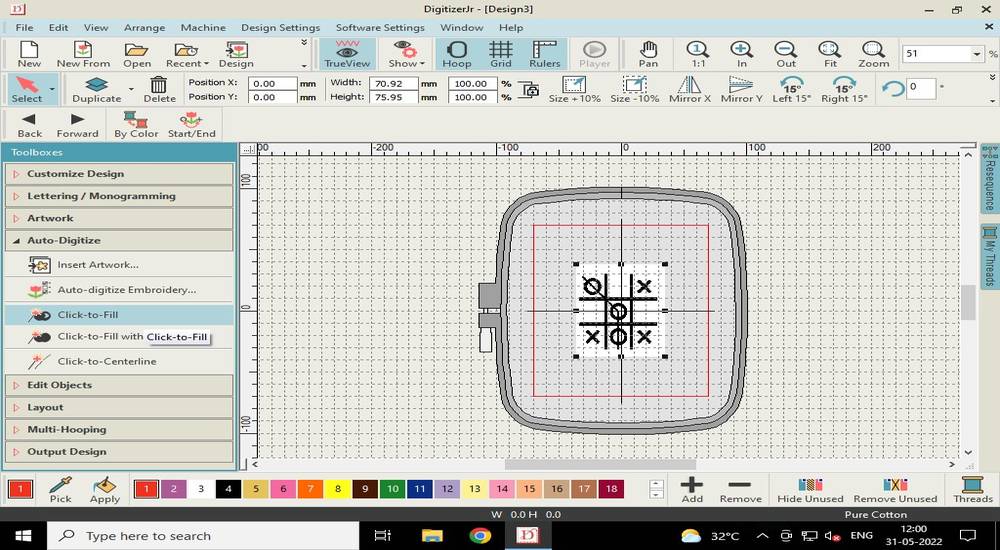
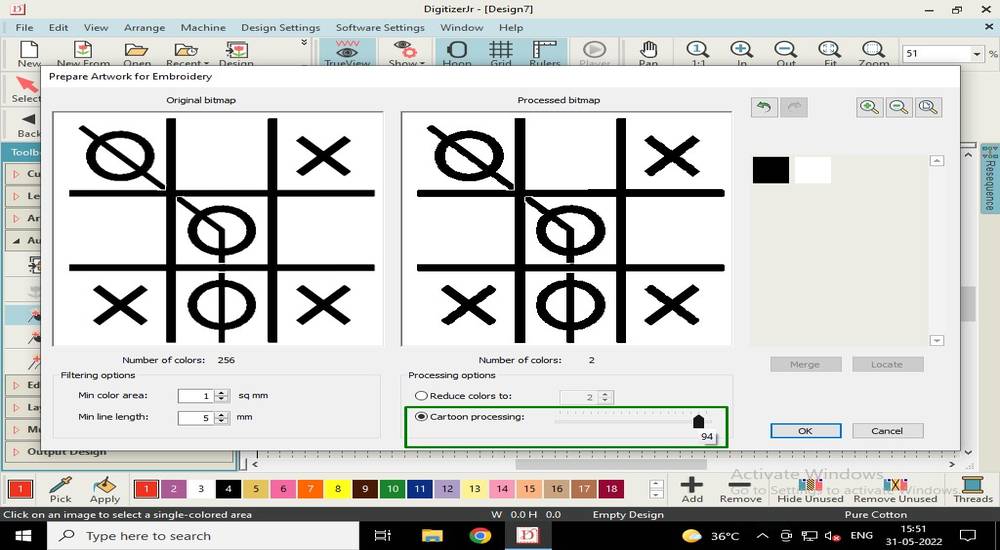
a menu will pop up. Select "Cartoon processing" under processing options and set the value of cartoon processing to 94,
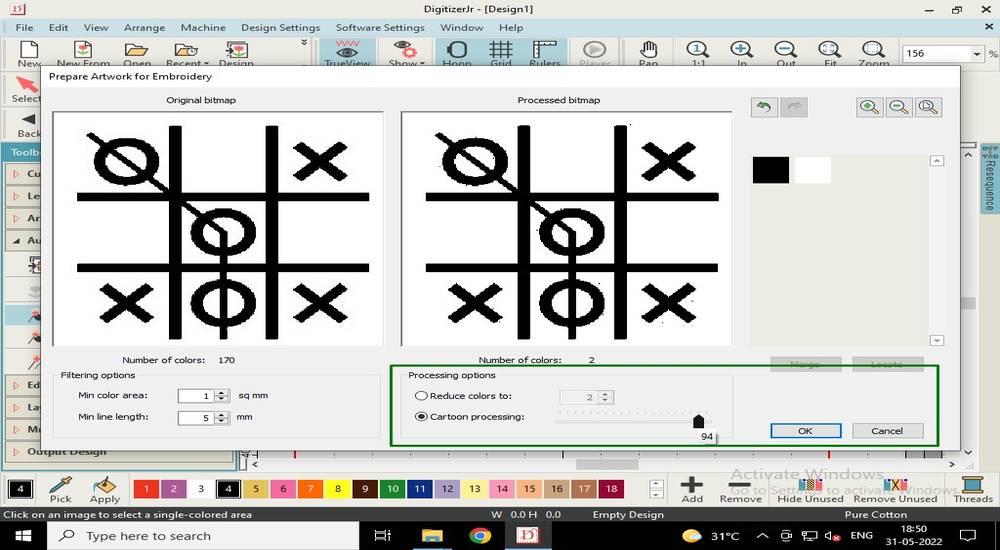
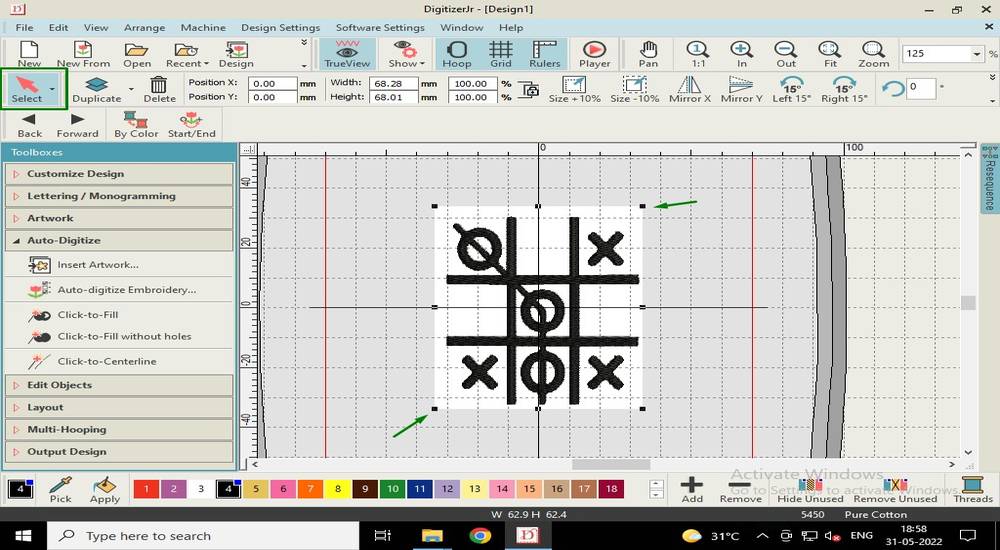
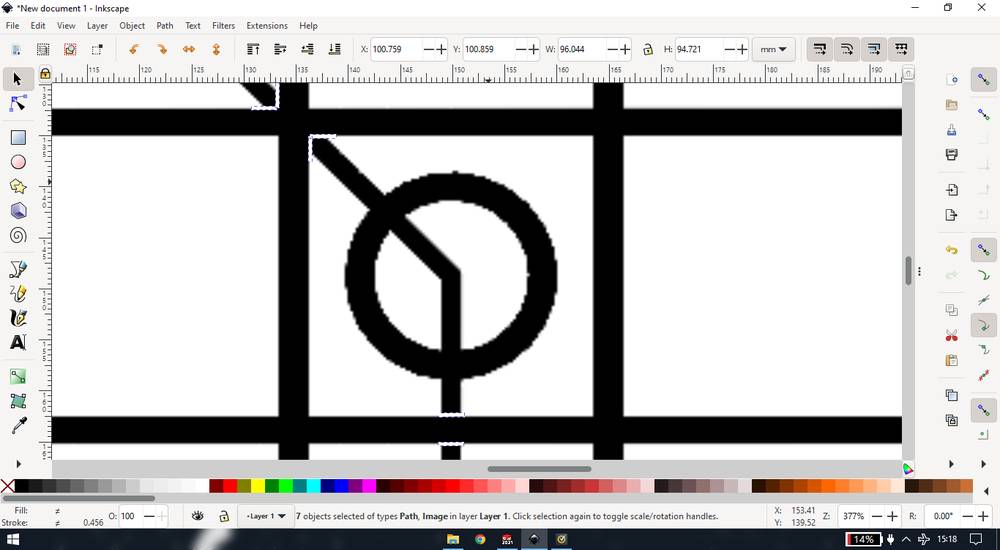
Now select every part of the design to assign them the toolpath,

Select the "Select" tab and click on the design and then press delete, to remove the backgroud,
now select each part of the design and assign them with the color in which you want to sew your design. This is just for your reference
while changing the reel of the thread,
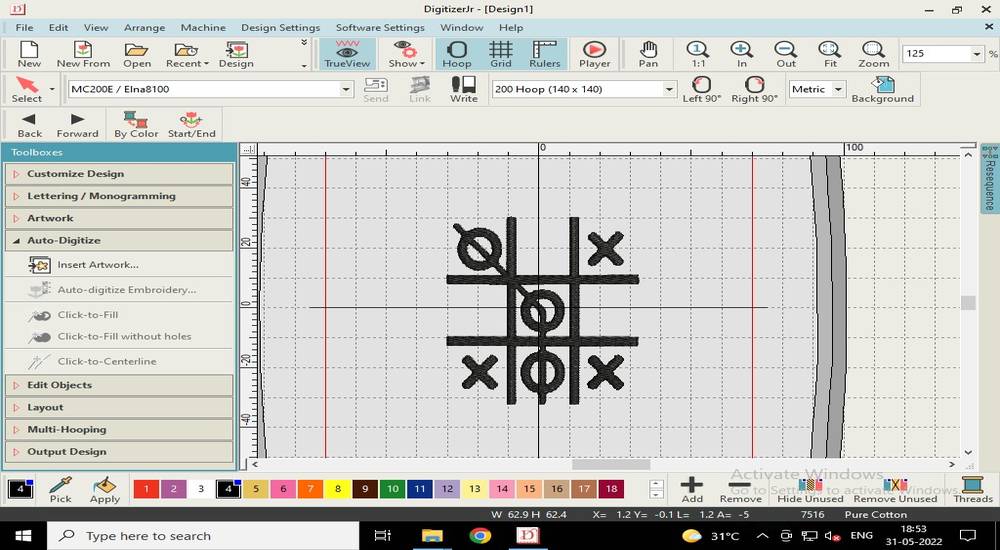
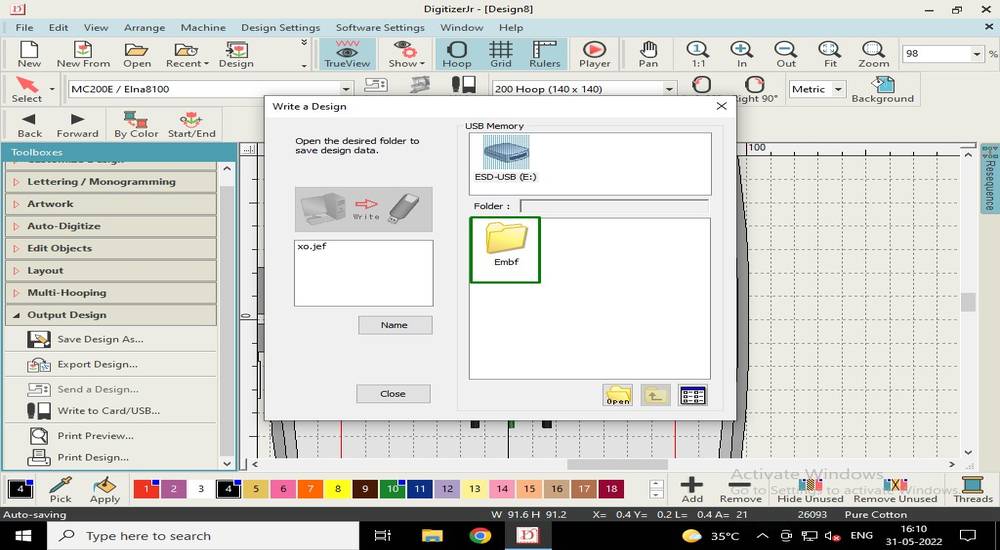
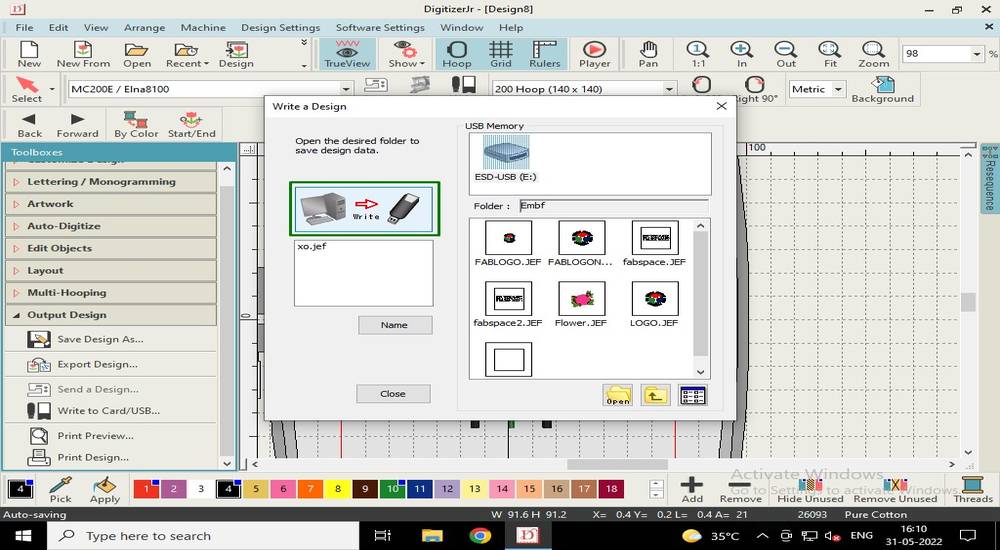
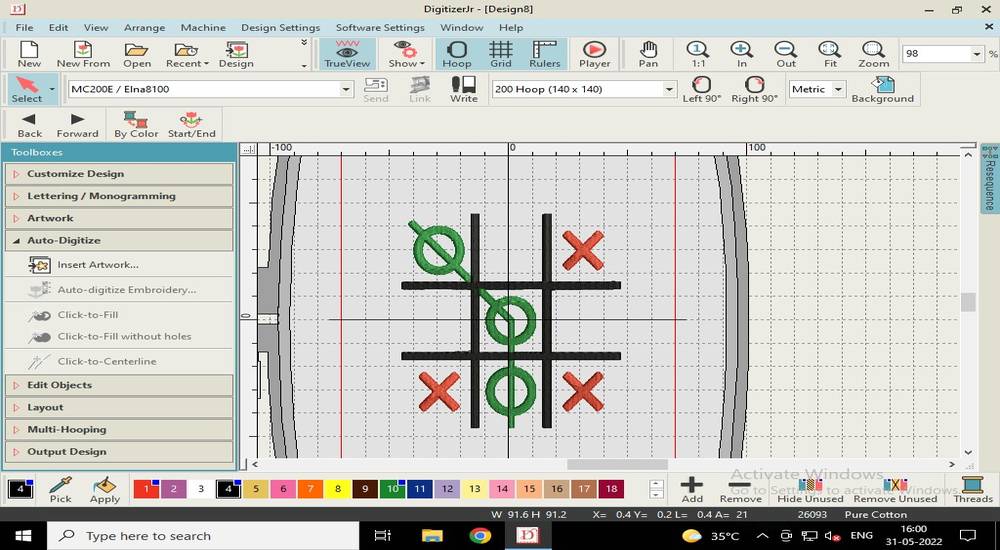
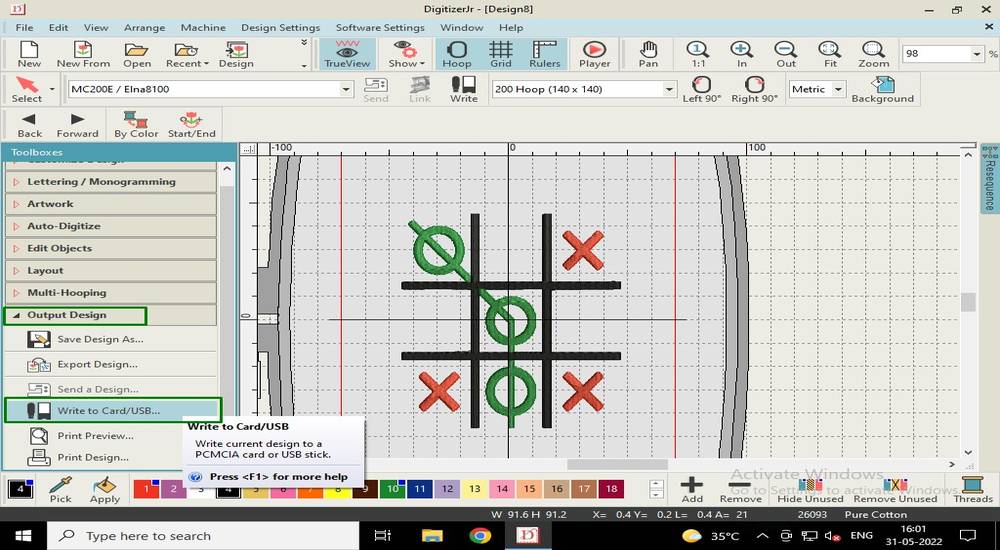
To export the toolpath, select "Write to Card/USB" under Output Design,
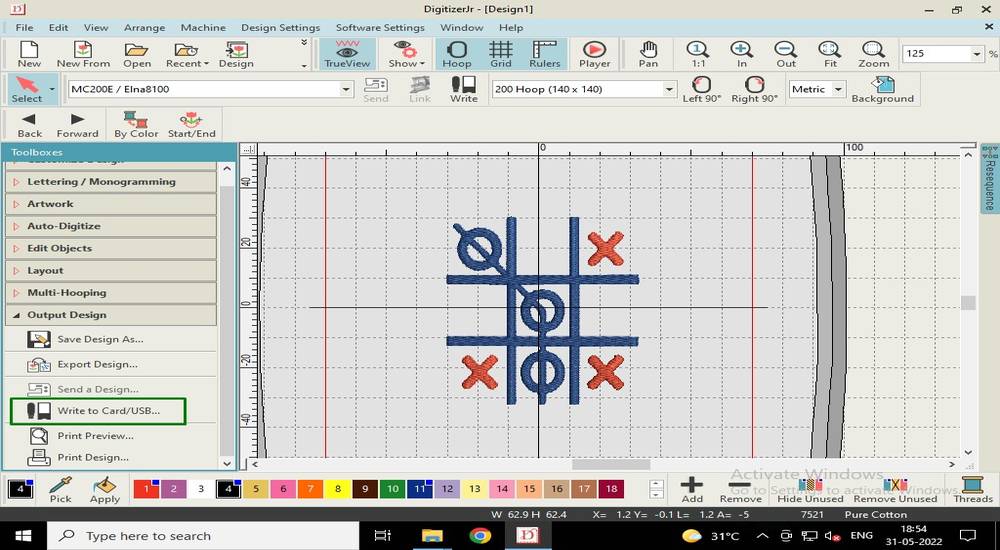
Click on the "name" tab and givyou toolpath file a name. The toolpath file for the CNC Sewing machine is .jef
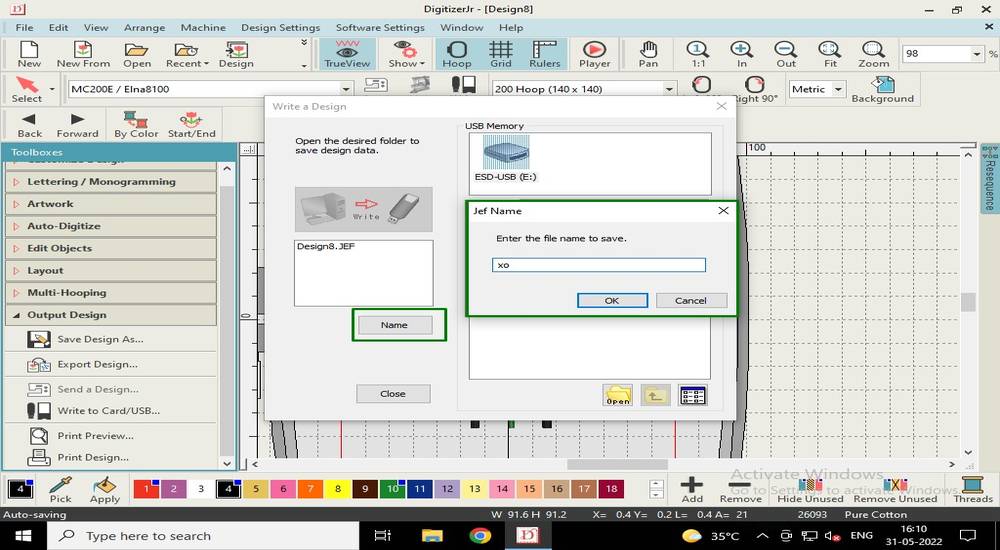
Select the path where you want to export the toolpath file and then click on "write" button,
you can download the toolpath from here,
xo cloth toolpath
outcome
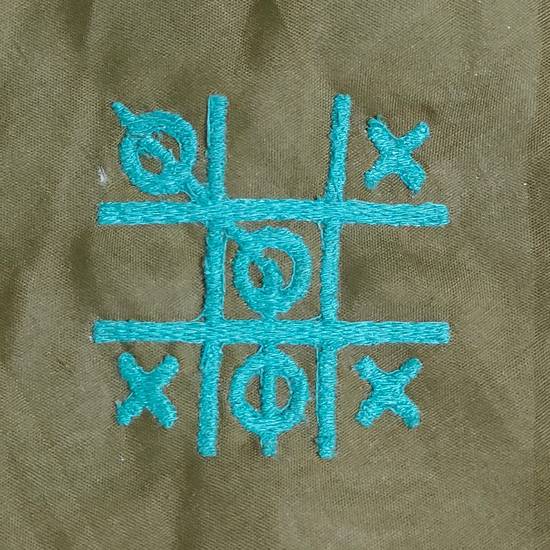
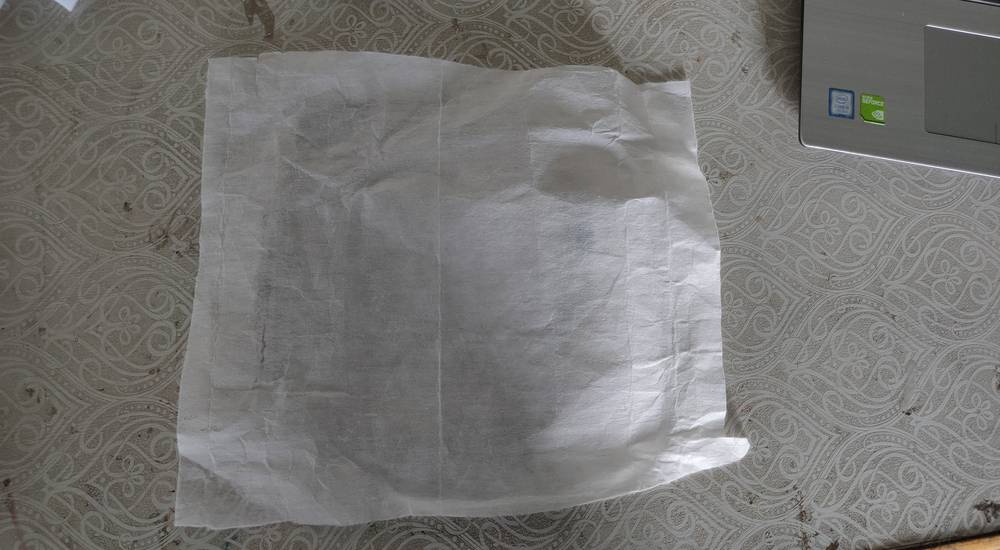
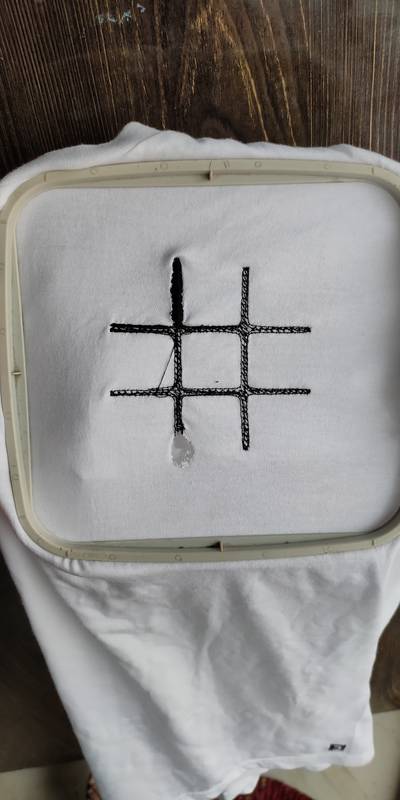
As i was opeating the machine for the first time, i first sew the design on a spare piece of cloth with a single color thread just so i can
get to know how the machine works. This was the outcome after the sewing was done,
Changes in the design
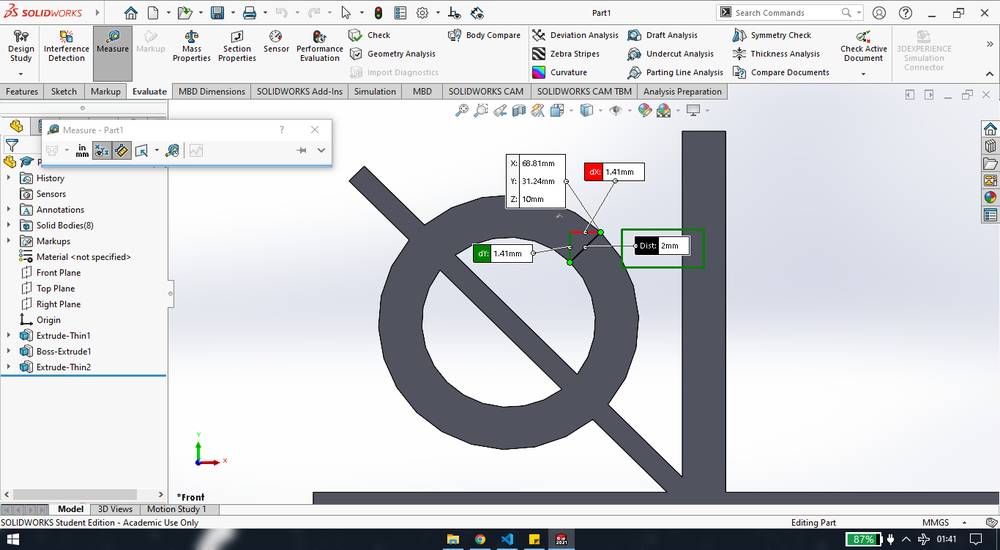
Looking at the outcome, i decided to change the thickness of "X", "O" and "#" to 1.5mm

I wanted the tic-tac-toe design in three colors, the "X" in red color, the "O" and the line connecting the "O" in green color and the "#" in
black color. But since the line connecting the "0" was merging with the "#", i was not able to select the "O" and the "#" individually and
when i select just one "O", every "O" and the "#" was getting selected,
So what i had to do was break he connection between the line connecting the "O" and the "#" so that i can assign individual toolpath to every
"O+line connecting the O", "X" and the "#". To make that edit, i added a thin white line from inkscape,
here is the png file after making the edit,
you can download the solidworks design file after changing the thickness from here:
xo tshirt design
Re-generating the toolpath
I'll again explain the steps for generating the toolpath,
i selected "MC200E/Elna8100" as the machine,
select the hoop size,
import the monochrome image by selecting "Insert artwork" under Auto-Digitize,
Select "Click-to-fill" under Auto-Digitize and then click on the image,
a menu will pop up. Select "Cartoon processing" under processing options and set the value of cartoon processing to 94,
the white line that i added in the inkscape did work! Now when i select the "#" only the "#" was getting selected and not the "O",
Now select every part of the design to assign them the toolpath,
Select the "Select" tab and click on the design and then press delete, to remove the backgroud,
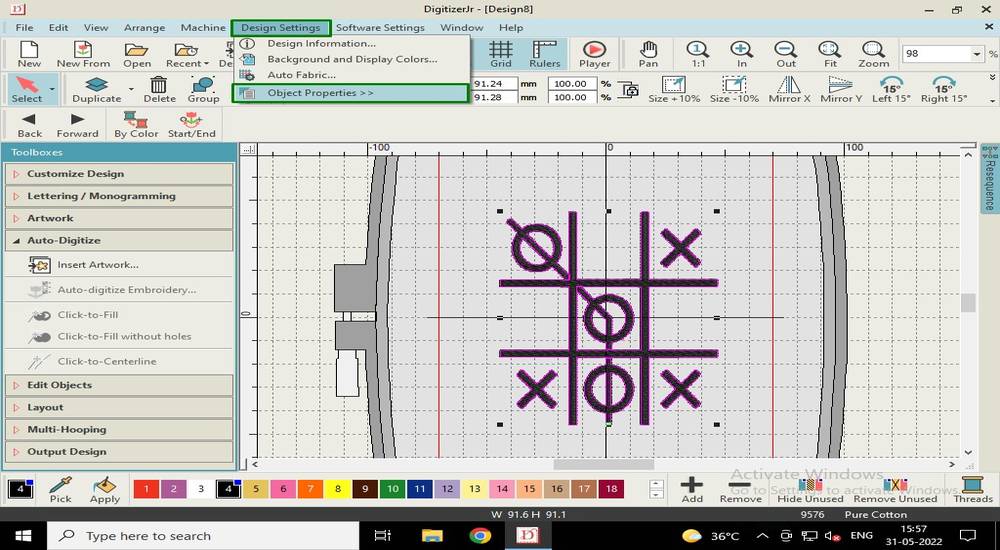
before assigning the color to each part of the design, i made some changes in the object properties. Select each part of the design or just press
Ctrl+A and then go to "Object properties" under "Design settings",
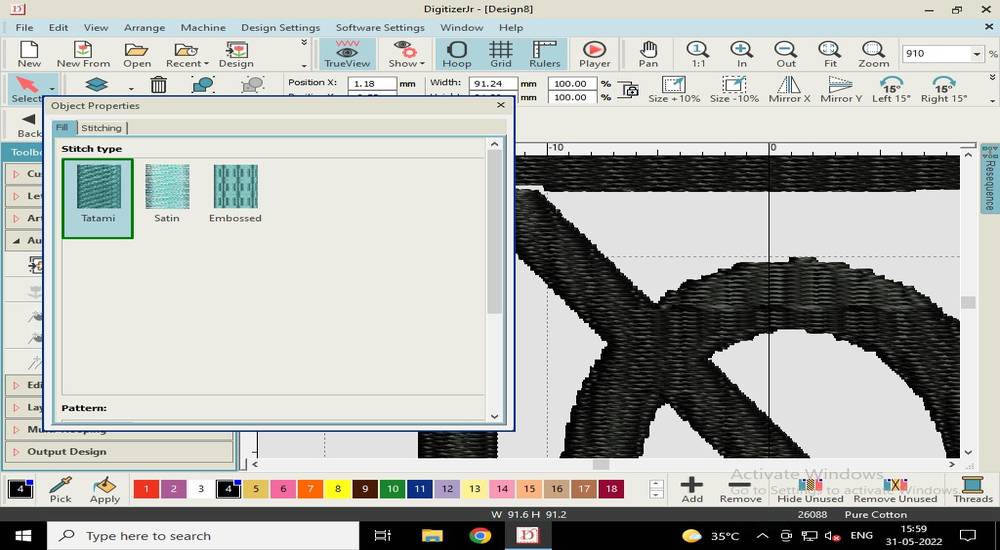
On the "Fill" tab, under Stitch type, select "Tatami",
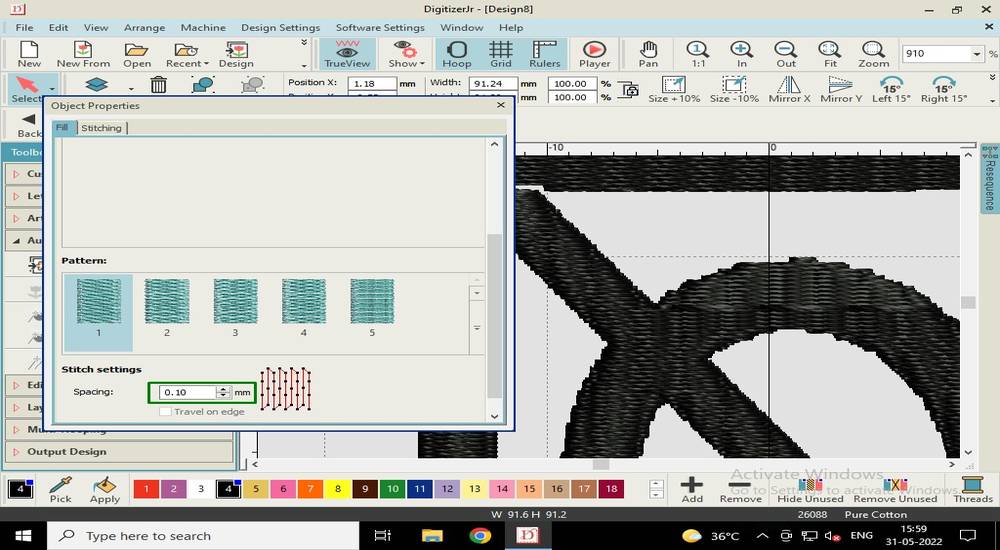
under stitch settings, set the spacing to 0.10mm. By default it is 0.4mm,
now select each part of the design and assign them with the color in which you want to sew your design. This is just for your reference
while changing the reel of the thread,
To export the toolpath, select "Write to Card/USB" under Output Design,
Click on the "name" tab and givyou toolpath file a name. The toolpath file for the CNC Sewing machine is .jef
Select the path where you want to export the toolpath file and then click on "write" button,
you can download the toolpath from here,
xo tshirt toolpath
Operating the machine
After sewing the first design on a spare piece of cloth, i now wanted to stich the new design on the tshirt. I'll explain in brief about how to
operate the machine and the steps i followed,
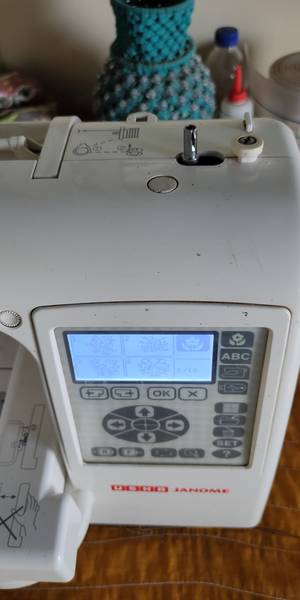
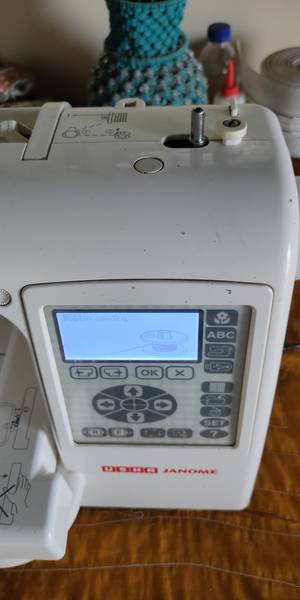
This is how the CNC sewing machine looks like,
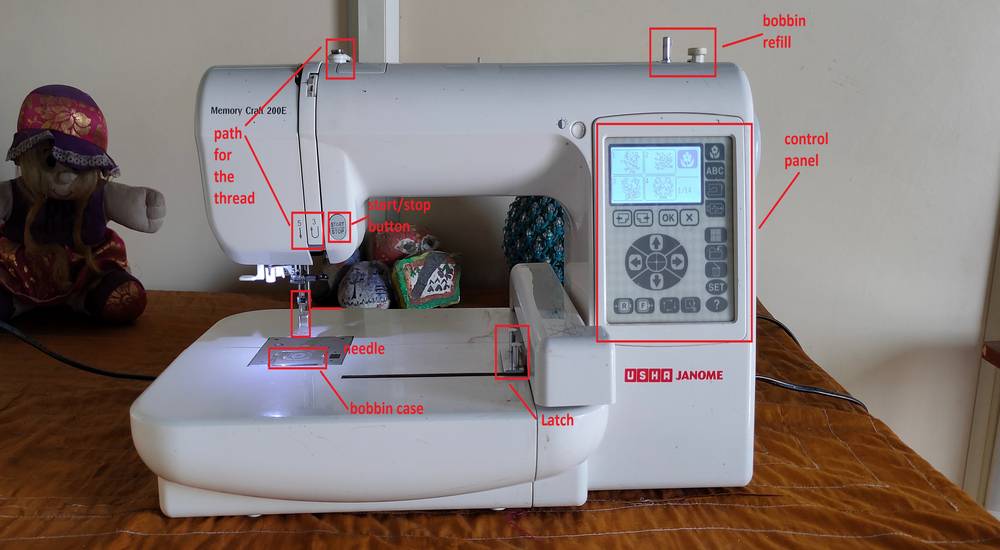
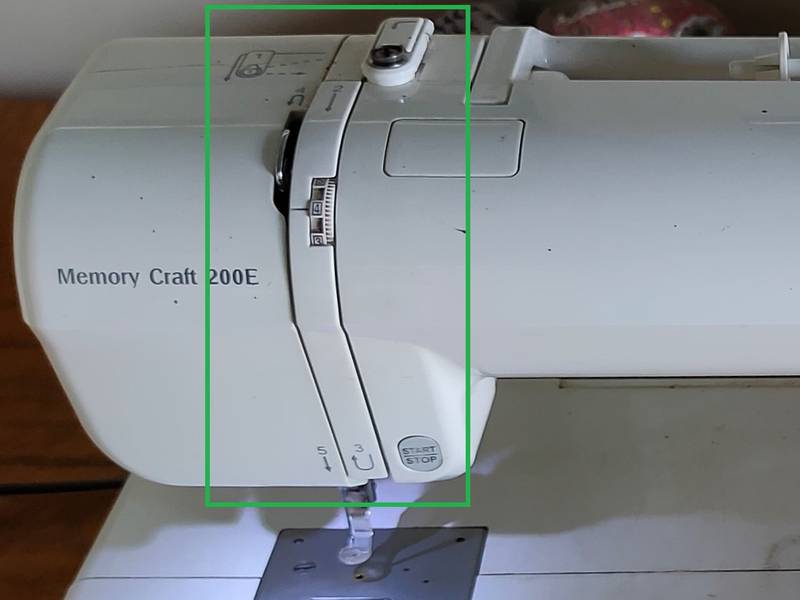
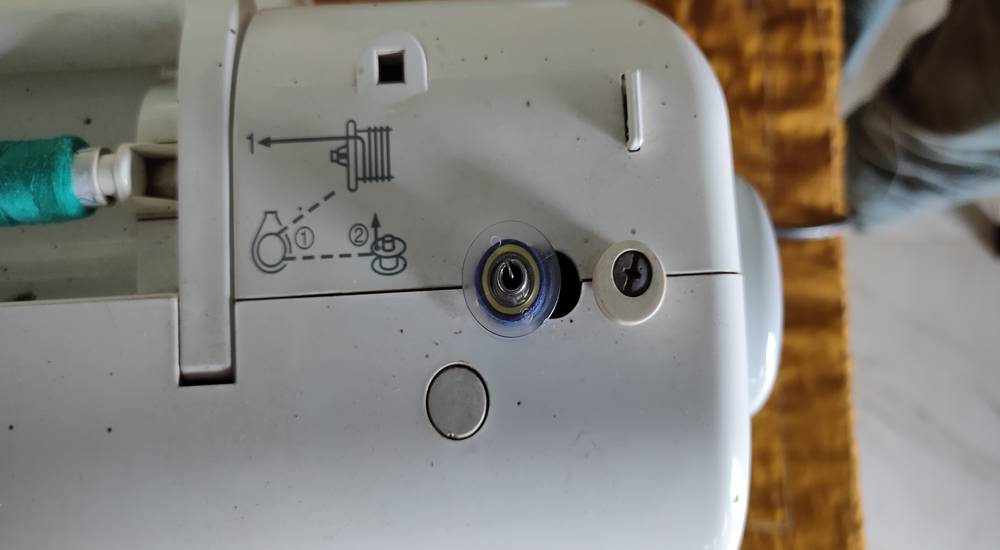
I first prepared the machine by inserting the thread reel and bobbin into it's place. Placing the thread reel,
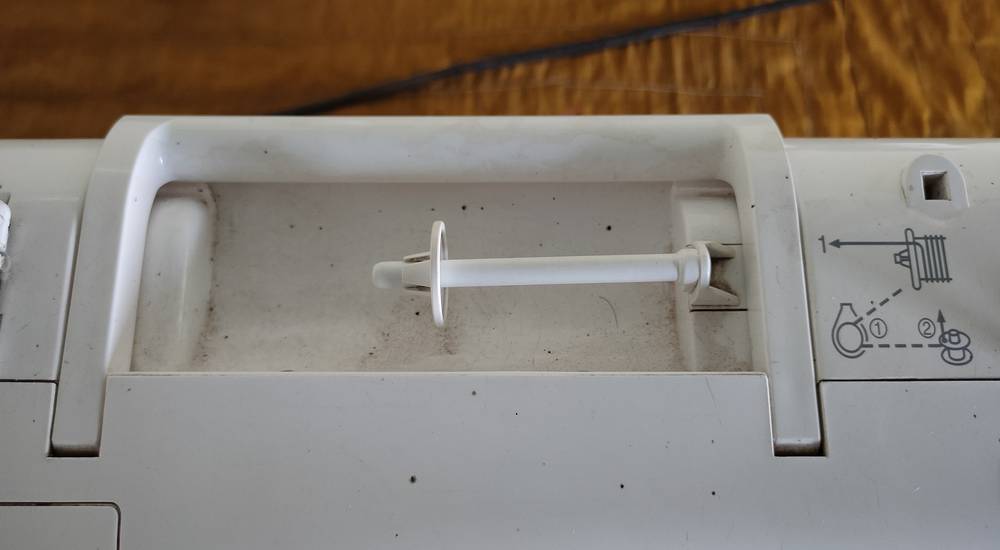
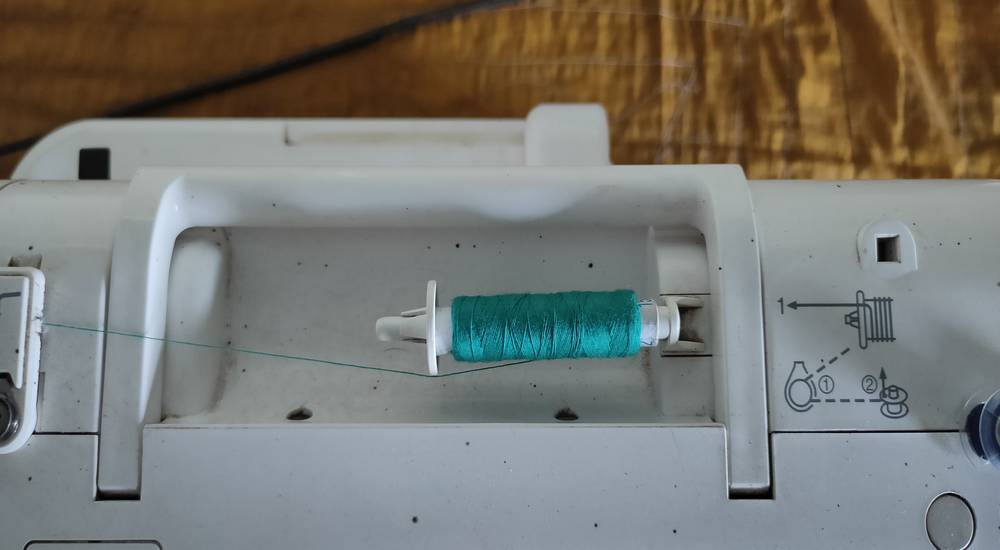
Placing the bobbin into it's place,

you can refill the bobbin with the help of the thread reel. First manually fill the bobbin by interwining the thread clockwise and then place
the bobbin into the metal rod and slide it on the right side with thread reel onto its place,
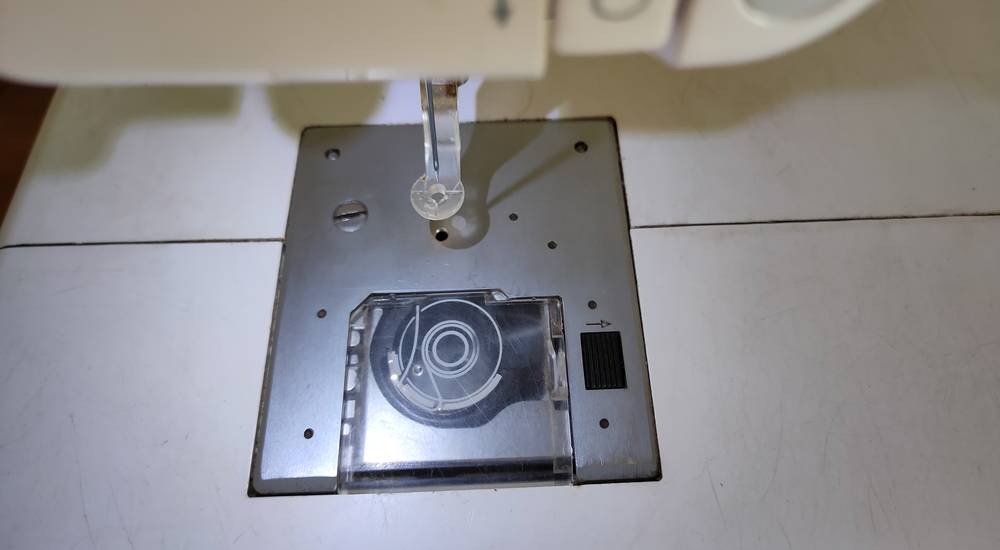
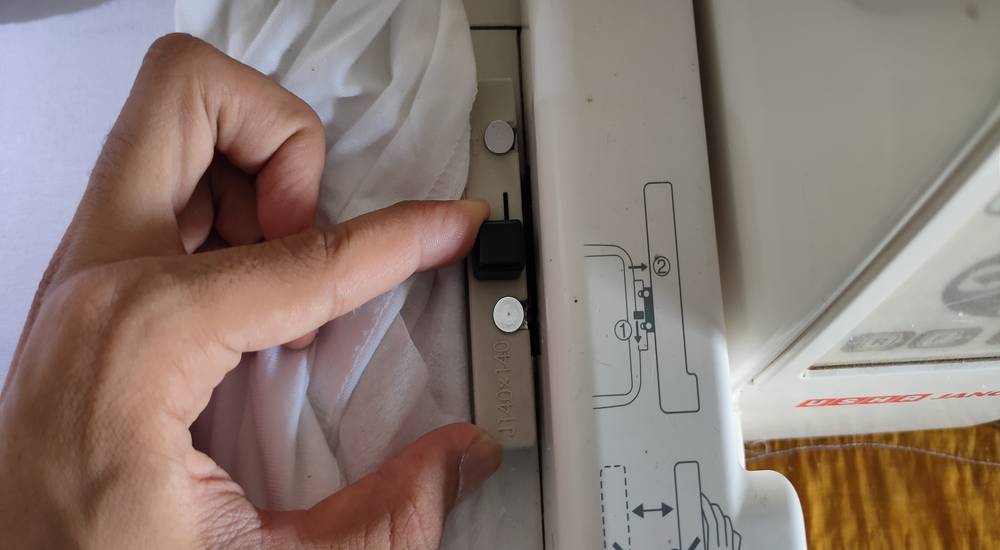
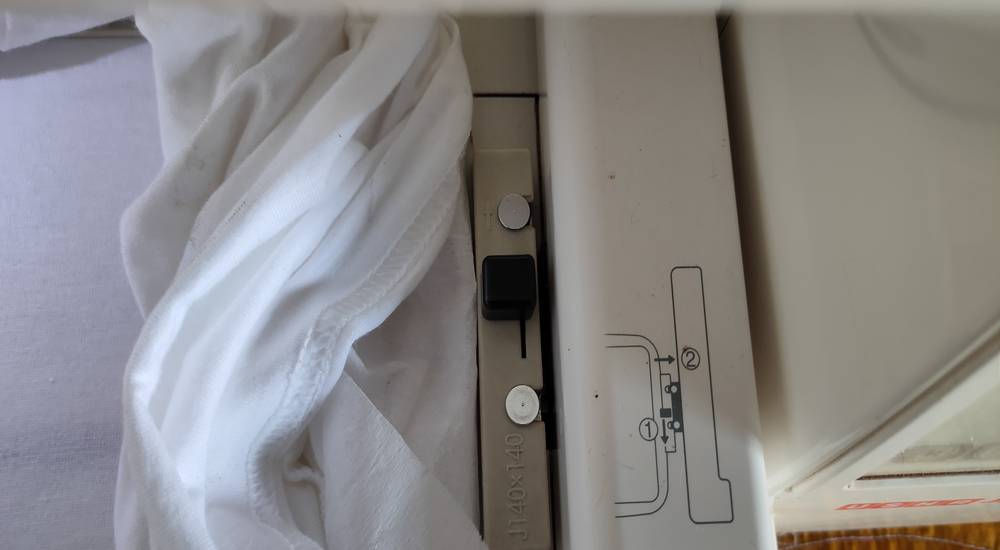
IF you see the control panel, when you slide the metal rod to the right, the mode will change from sewing to refill. With the metal
rod switched to the right, press the start/stop button and the bobbin will start to refill the thread from the thread reel and it will
automatically stop once it is completely filled.
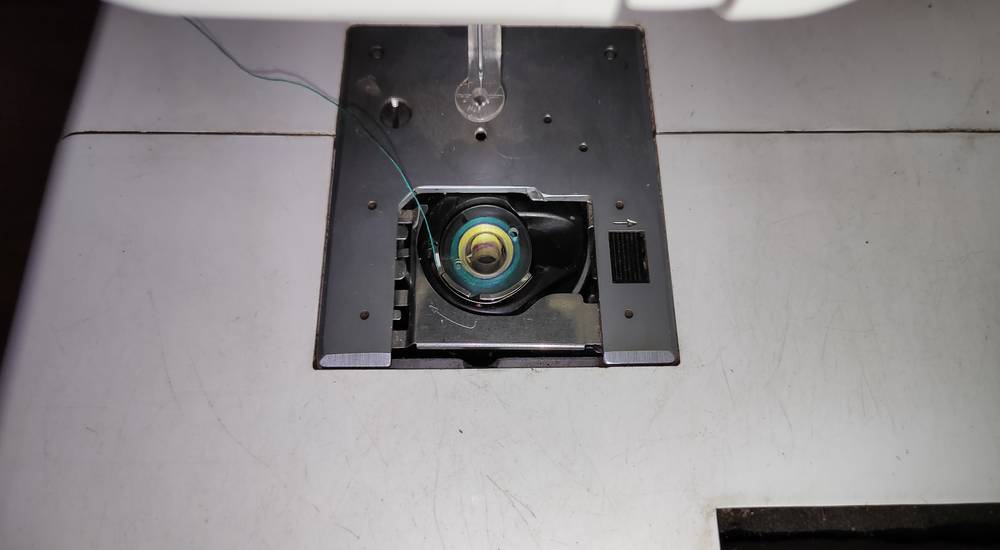
after the bobbin is refilled, place it in it's place and keep the end of the thread outside and then close the case,
once the bobbin is set, you need to insert the thread of the reel into the needle. However you cannot directly insert the thread into the needle,
you have to pass the thread through the specific path/route,


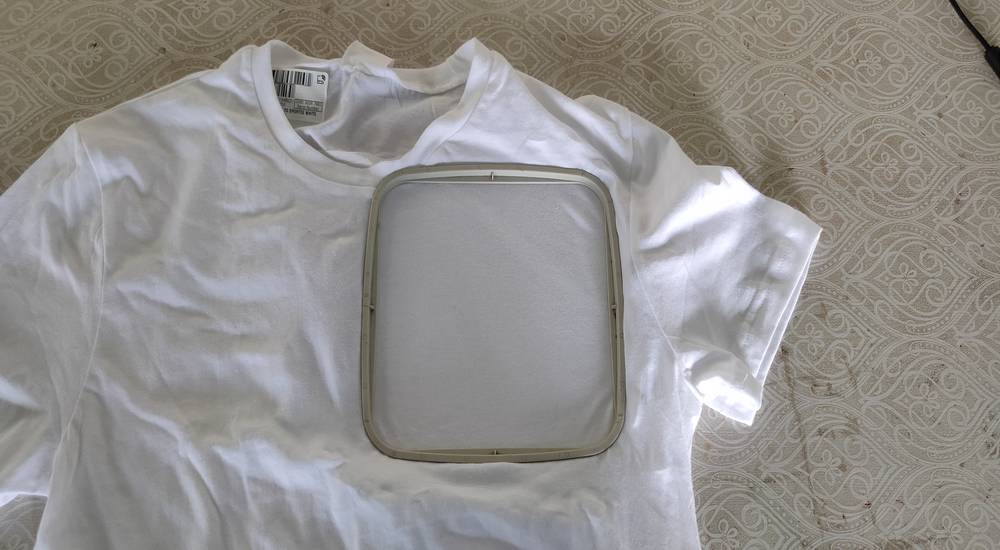
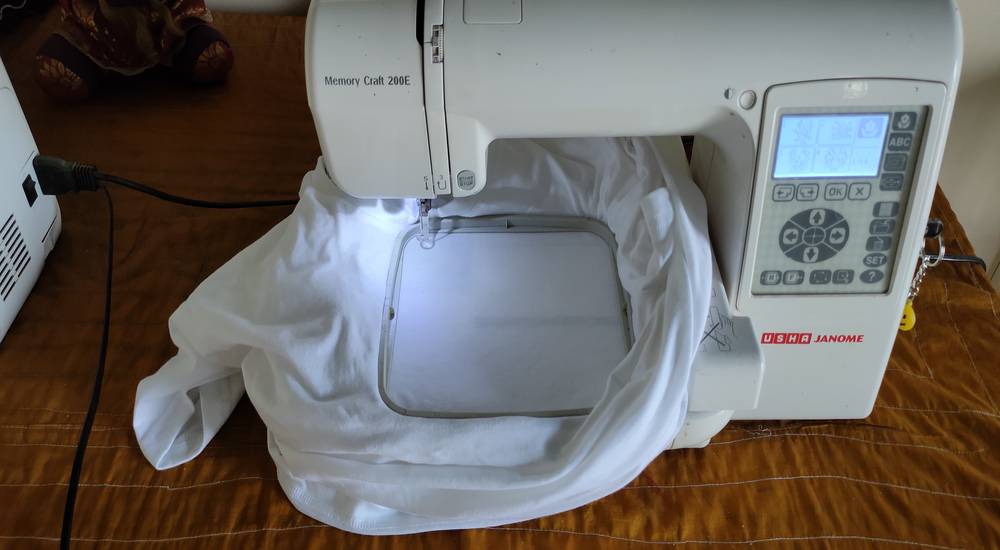
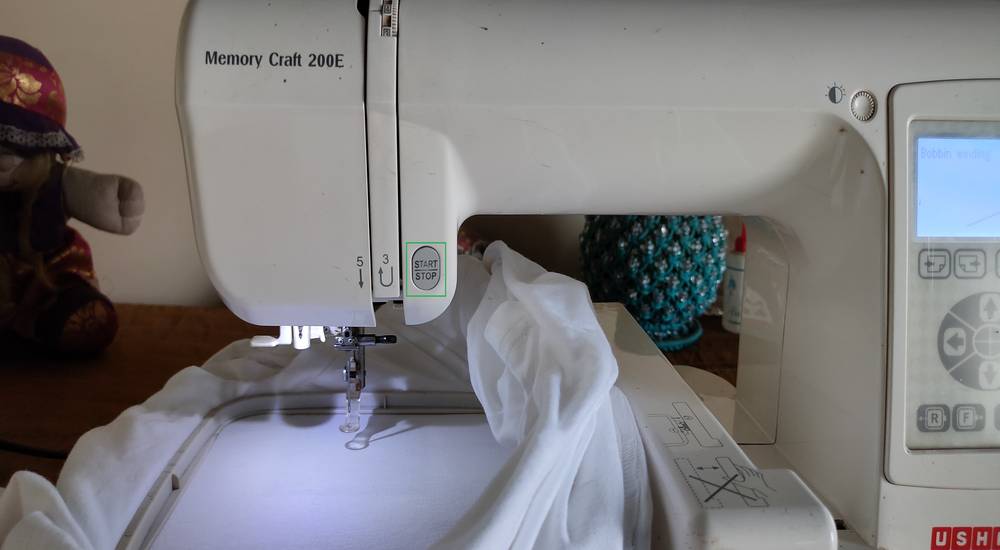
With the machine prepared with thread reel and bobbin, i started preparing the t-shirt by attaching the hoop. This is the 140x140 hoop.
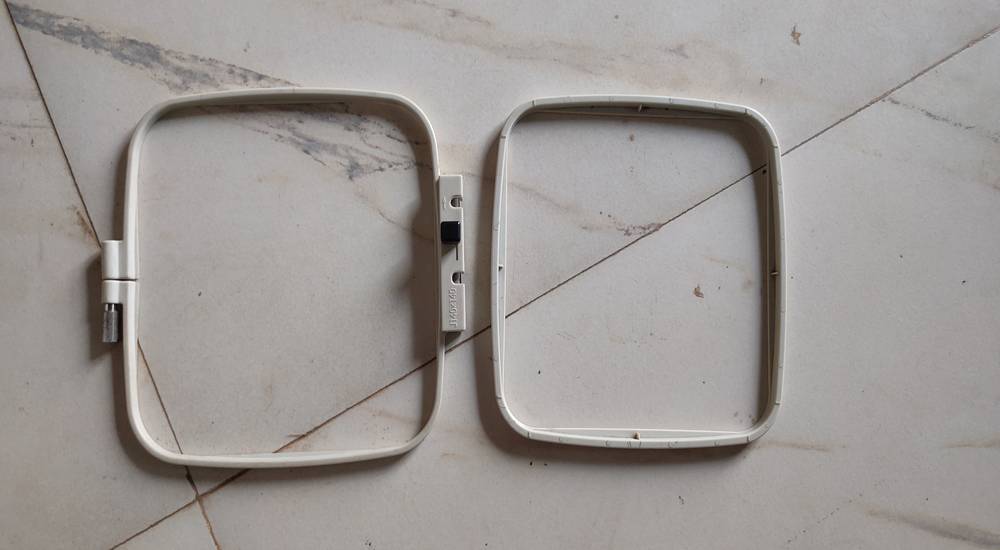
the hoop on the left is the bottom hoop which is meant to be put under the cloth and that hoop will be locked into the hatch of the machine. You
need to put a canvas onto the bottom hoop before fixing it with the cloth. So there will be the bottom hoop, on top of that there will be
canvas, on top of that there will be cloth and on top of that there will be the top hoop.
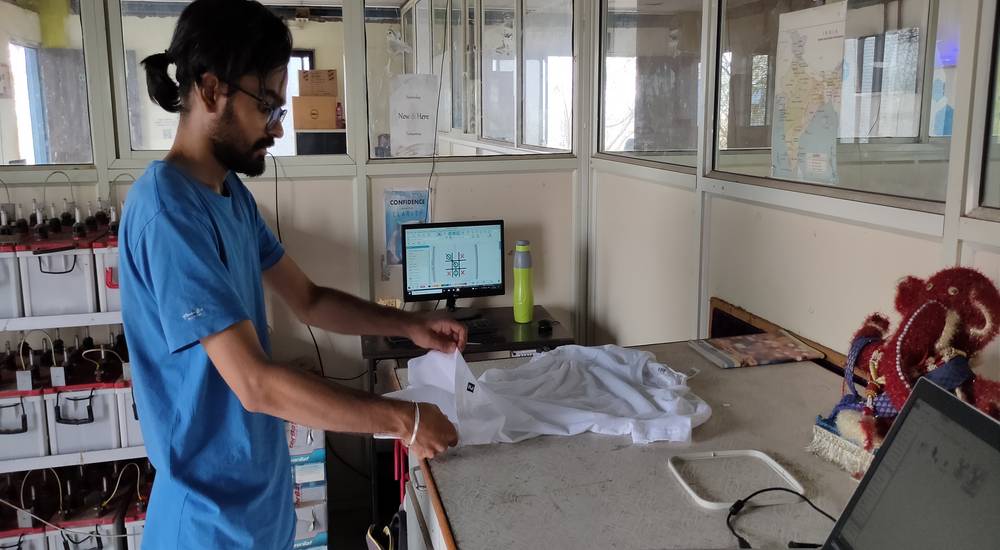
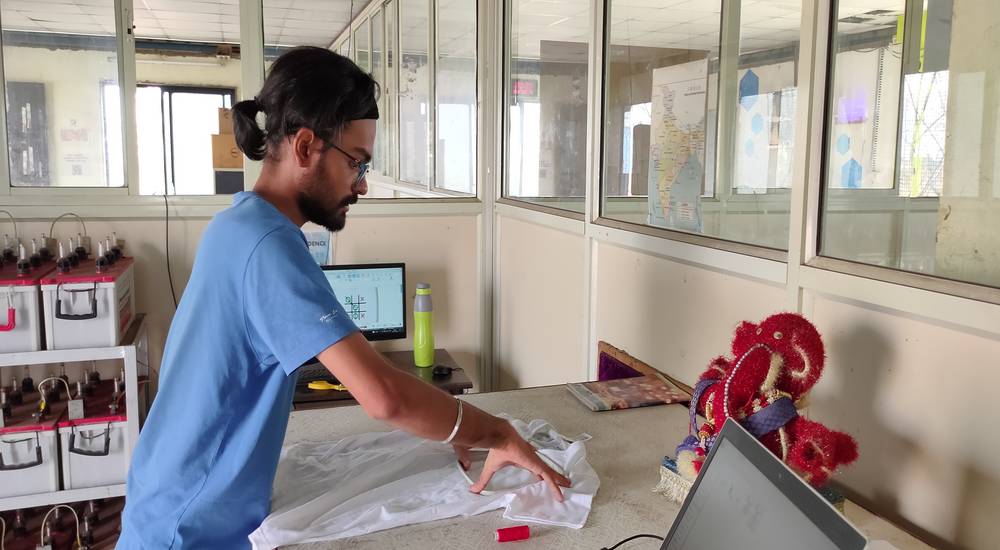
After fixing the top hoop, you need to stretch the cloth so that there is no crease onto the cloth,
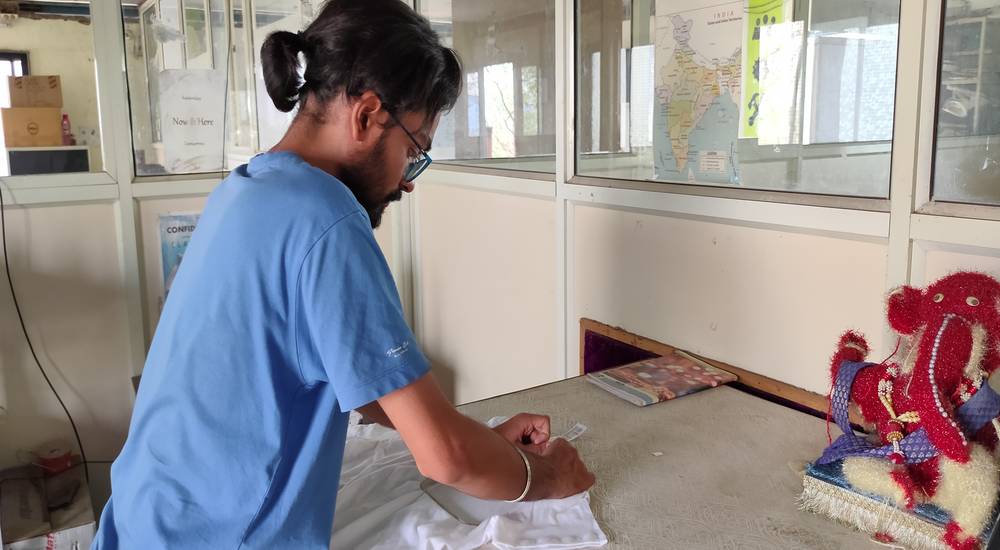
Once the tshirt is ready with the hoop attached, lock the hoop into the hatch of the machine. Before locking the hoop into the machine, make
sure that the bobbin is already in the case with the thread out AND only one side of the tshirt is is being slid under the needle or else both
side of the tshirt will be stiched together and you won't be able to wear the tshirt. In another words, make sure this is the orientation:
at the bottom there is the bottom hoop, on top of that there is canvas, on top of that there is one side of the tshirt and on top of that there
is top hoop.
To lock the hoop into the hatch: pull the slider on the hoop down, slide the hoop into the hatch and release the slider to lock the hoop into
the hatch,
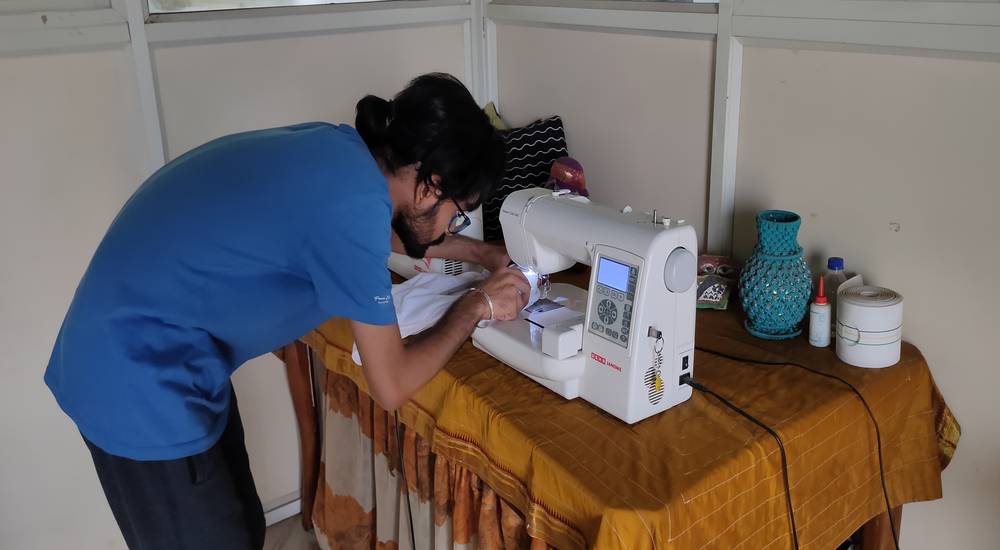
after the hoop is locked, we can start sewing the design. There is a slot for inserting the USB on the right side of the machine, insert the
USB with the generated toolpath/.JEF file into the slot and click on the USB button in the control panel,
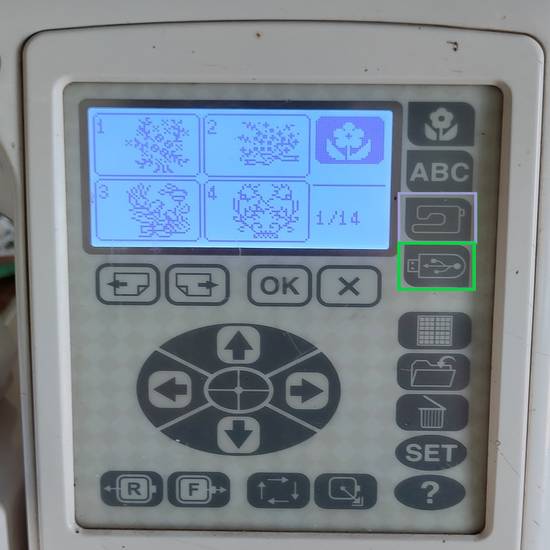
select the folder where the toolpath is saved,
select the toolpath/.JEF file,
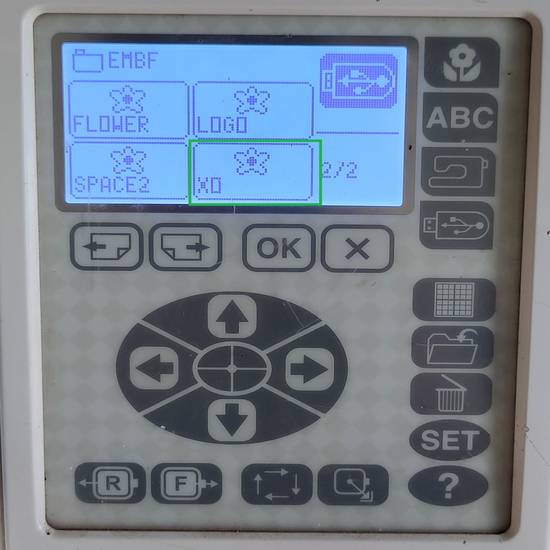
Once you design is opened, you can select which part of the design you want to sew first, the "#" one or the "X" one ot the "O" one. You can
navigate through the parts of the design through these button,
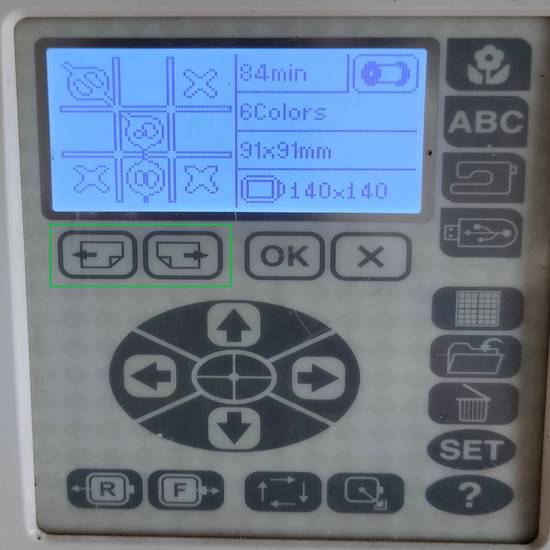
I decided to sew the "#" first,
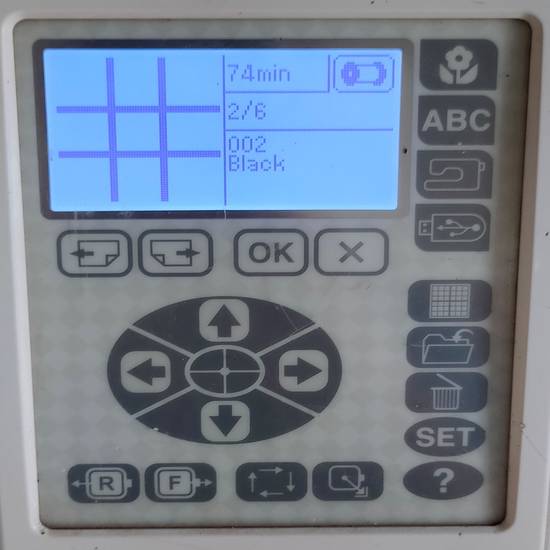
Then click on the start/stop button and the sewing will start,
I was facing this common issue countless number of times, which was "Rethread and start". This means that the thread in the needle is broke si
i had to rethread. So first i need to pull the thread from the machine and again insert the thread into the needle through that specific path/route.
While sewing, the needle tore a part of the tshirt. Because of this, when the machine was sewing on that particular part where there was no cloth,
the thread started to clog
in the bobbin case, due to which i had to open the whole case to remove the debris of thread,

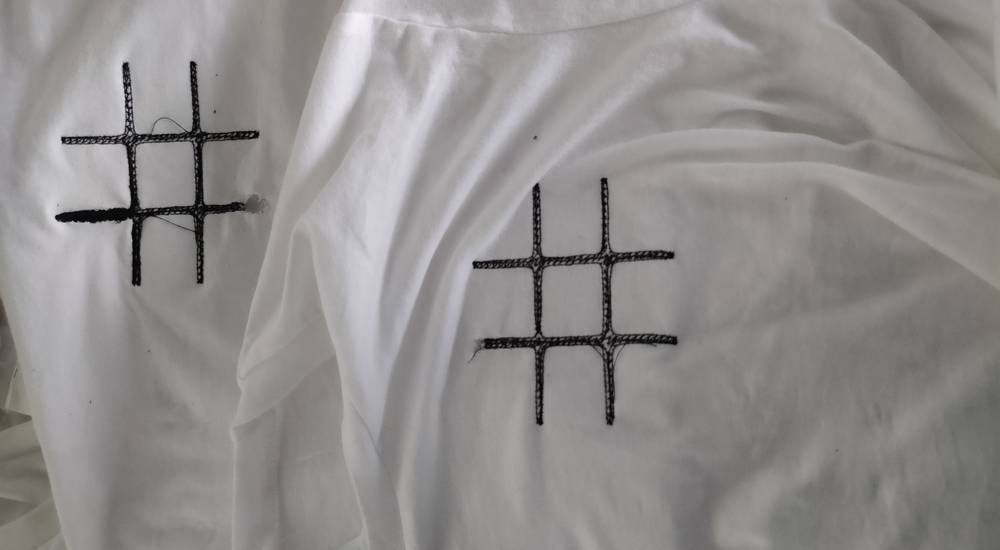
I knew the sewing was going to take a lot of time to finish the design, so instead of investing the time on this tshirt with the hole in it,
i decided to design the same logo onto a new tshirt.
Earlier, there was clogging in the bobbin case after the needle tore a small part of the tshirt and the machine kept sewing on the part where
there was hole. This time, there was clogging in the bobbin case
even with the tshirt in perfect condition,
due to which i was getting the Rethread error every 2 seconds and the thread in the needle was fine so i knew there was some issue with the bobbin
thread and i had to open the bobbin case
to clear the clogging. The tshirt was stuck with the bobbin thread and in order to cut the thread, the tshirt got stuck in the flap under the
needle and tore off,
First time the needle tore the tshirt and kept sewing in the place where the tshirt was torn so there was clogging in the bobbin case. This might
have happened due to poor quality tshirt. But i still don't know what happend for the second time where the tshirt was completely fine but somehow
there was still clogging in the bobbin case. I will try to sew the same design on the other cloth and this time i will sew with different color
thread, which was my intention and it is yet to explore, if the time permits.
Drip Irritation by Fenil Chandarana is licensed under Attribution-NonCommercial-NoDerivatives 4.0 International![]()
![]()
![]()
![]()